Overview
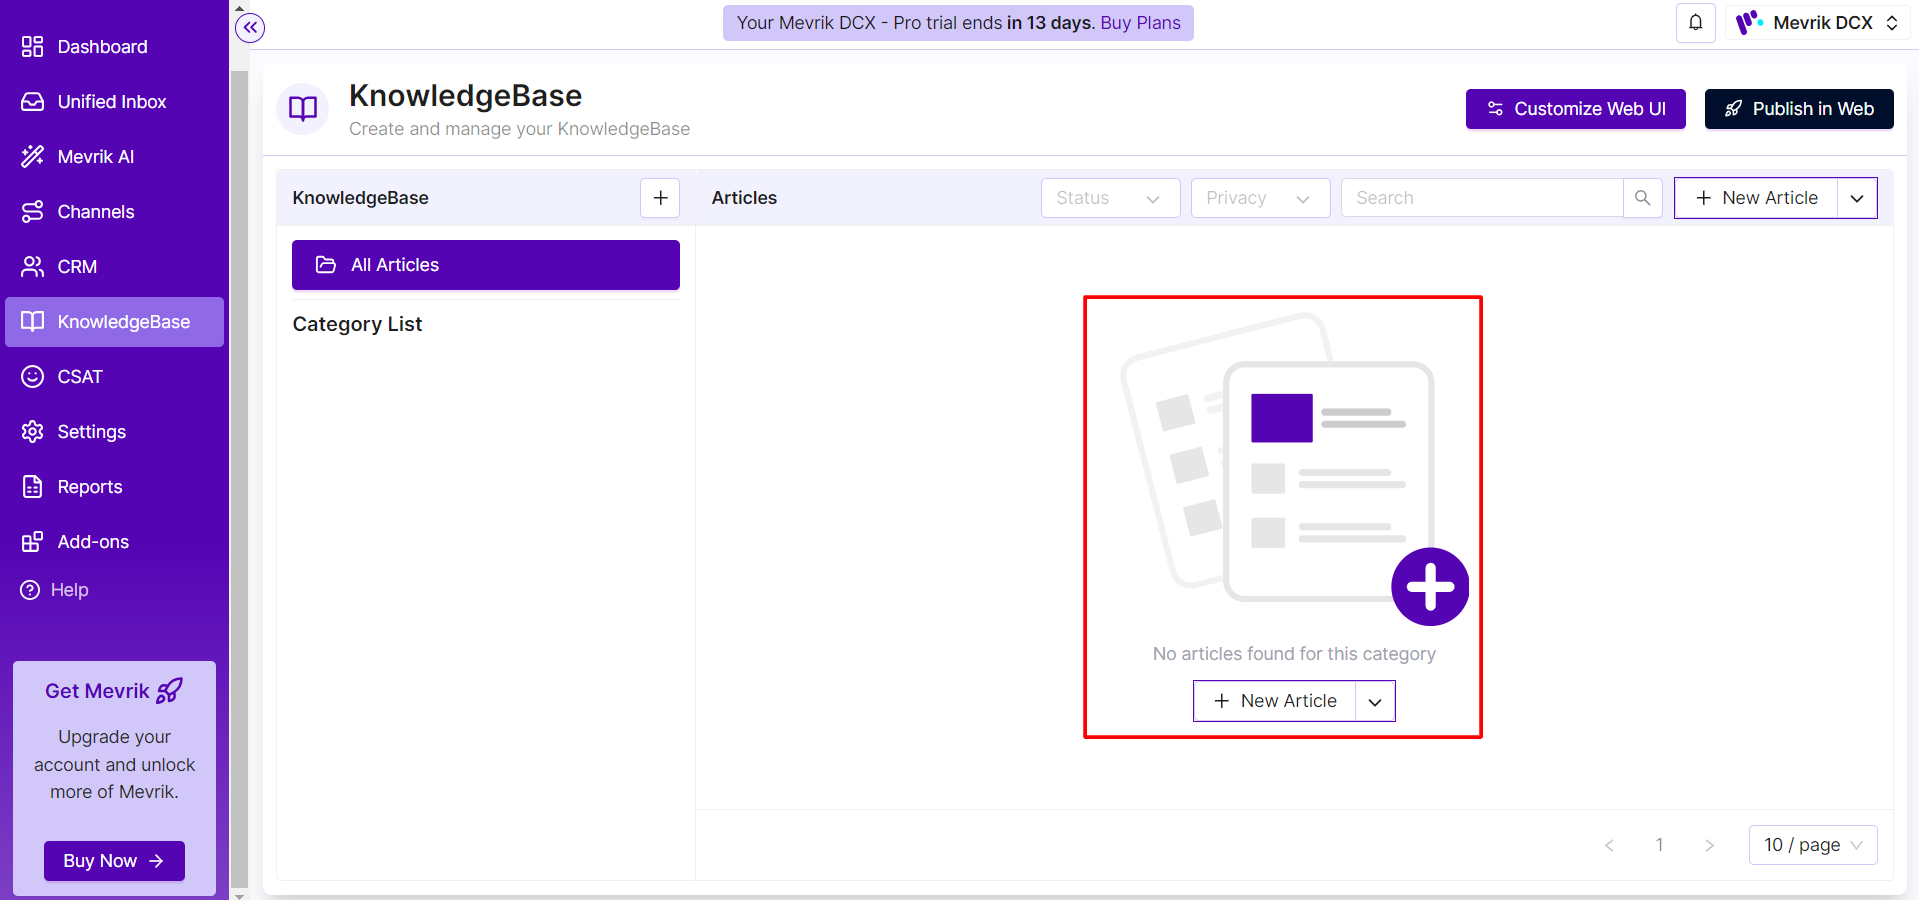
Step-1: Click on "New Article" button for creating a new article in knowledgebase.
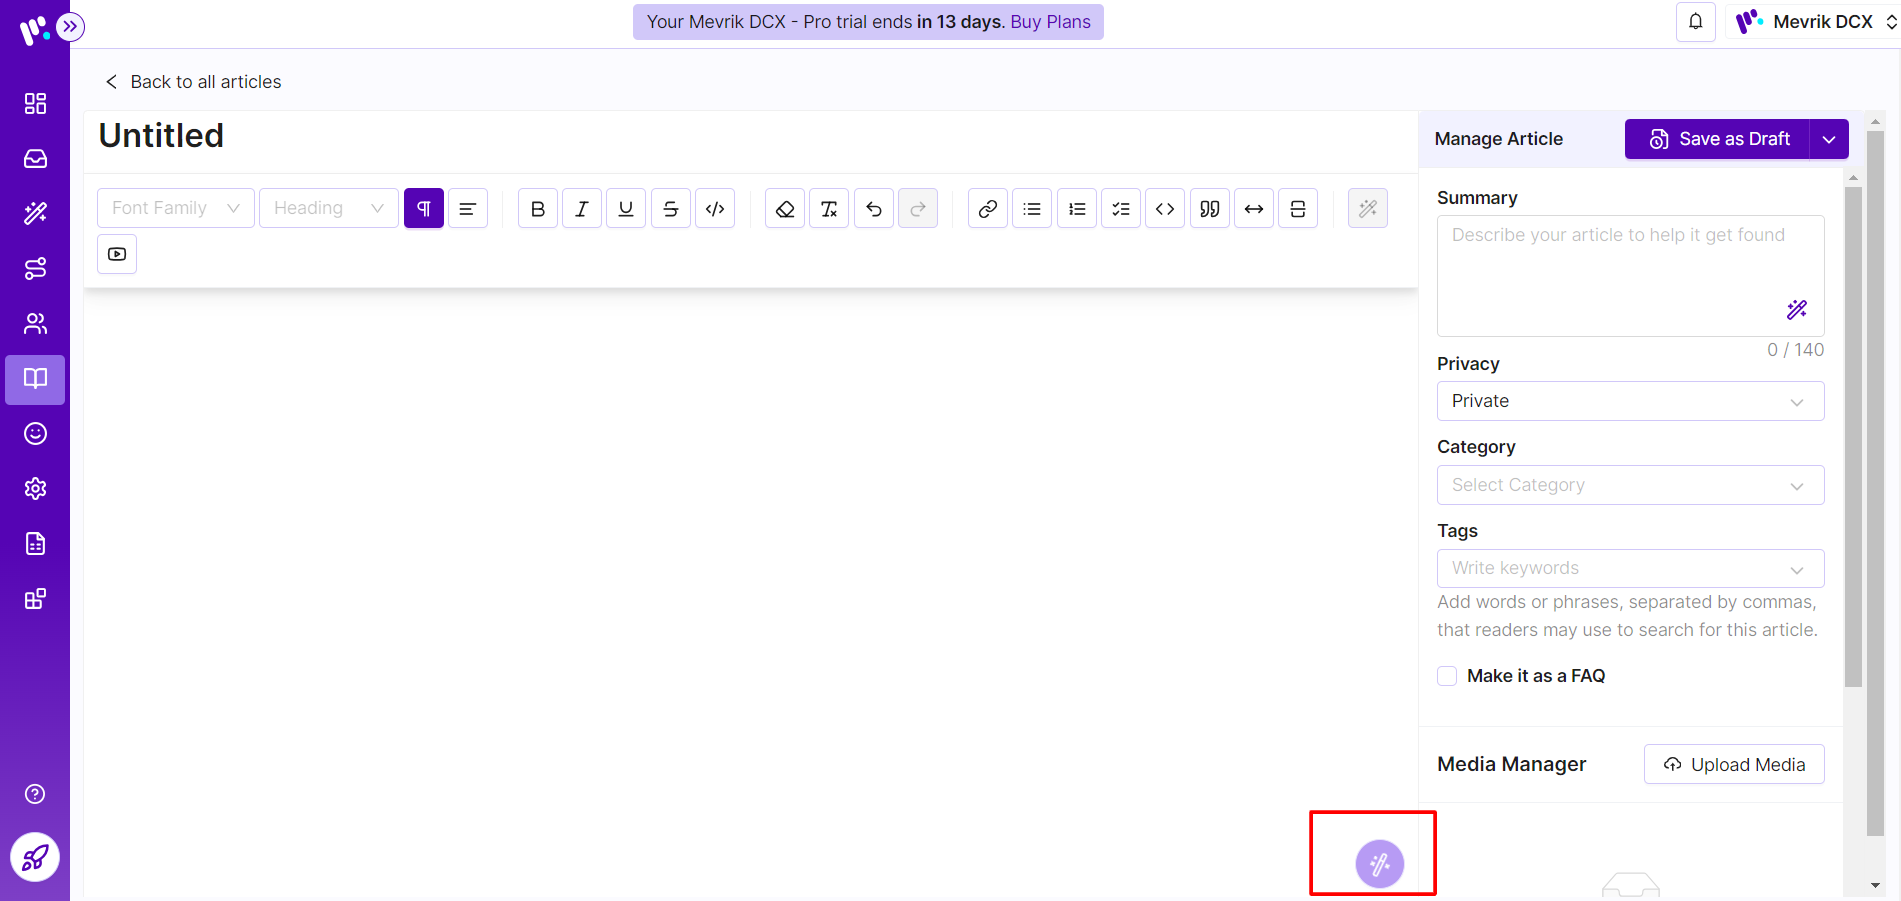
Step-2: Click on the "Mevrik AI" feature for generating an auto generate article.
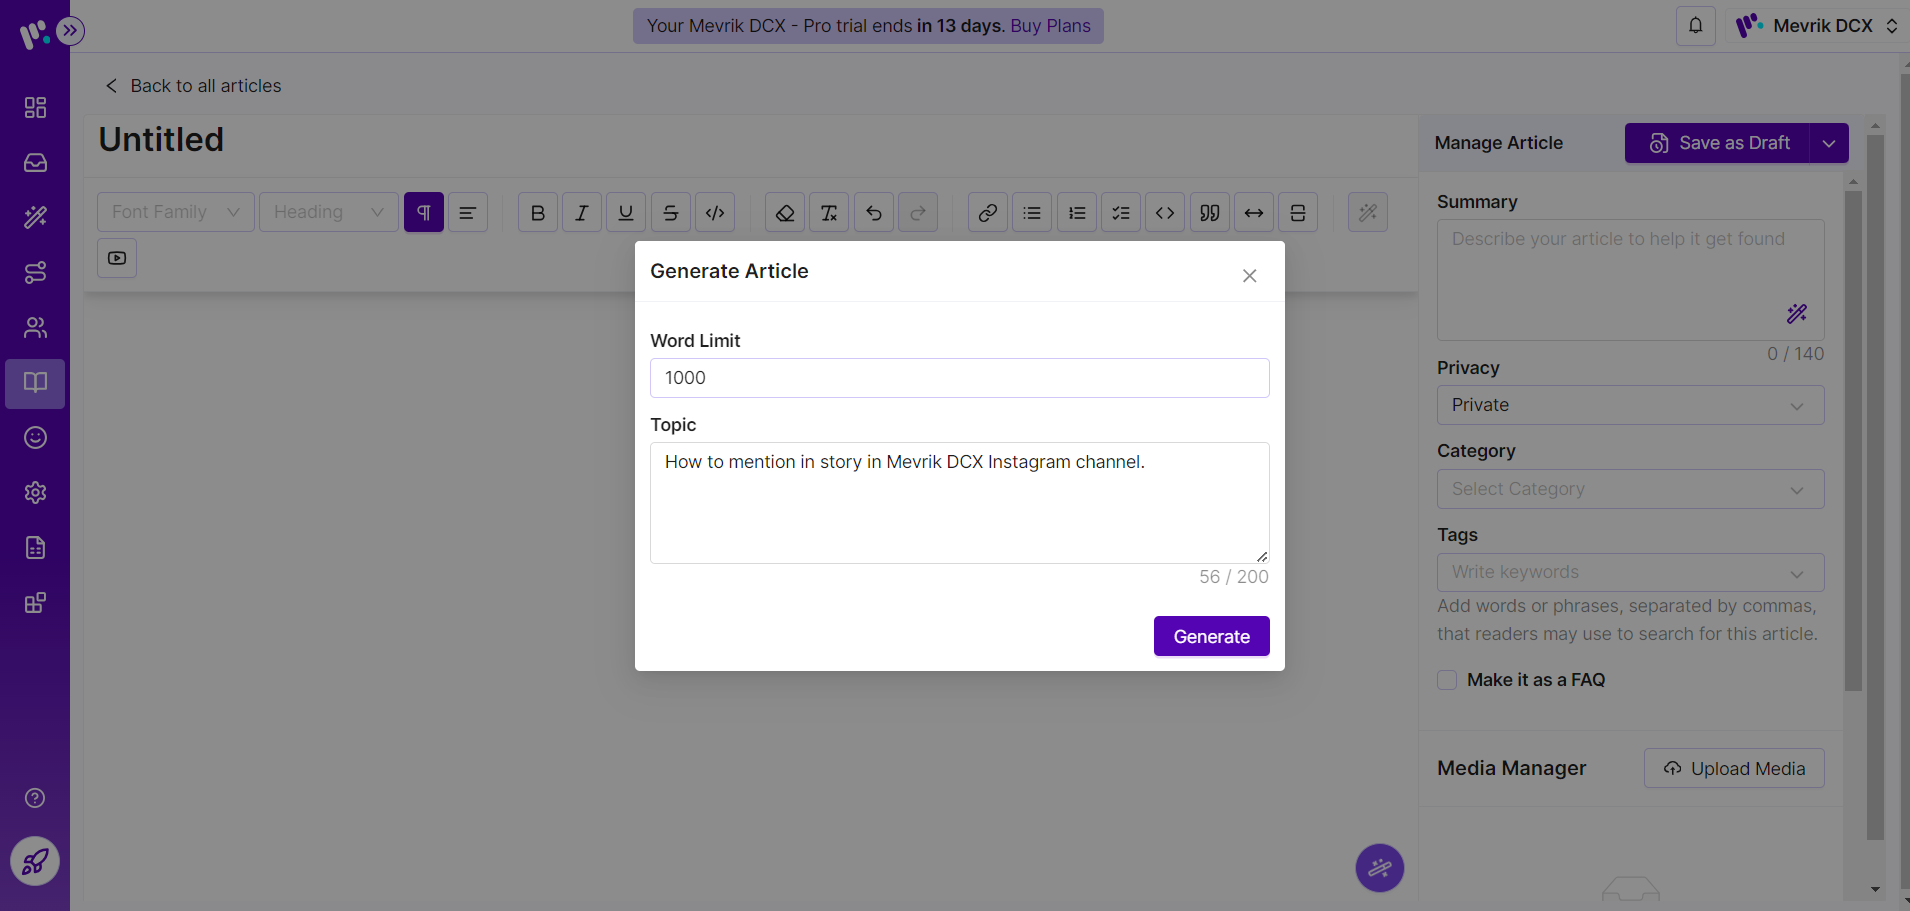
Step-3: In the article generation form, set a word limit ranging between 100 to 1000 words. Specify a concise topic for the article you wish to create.
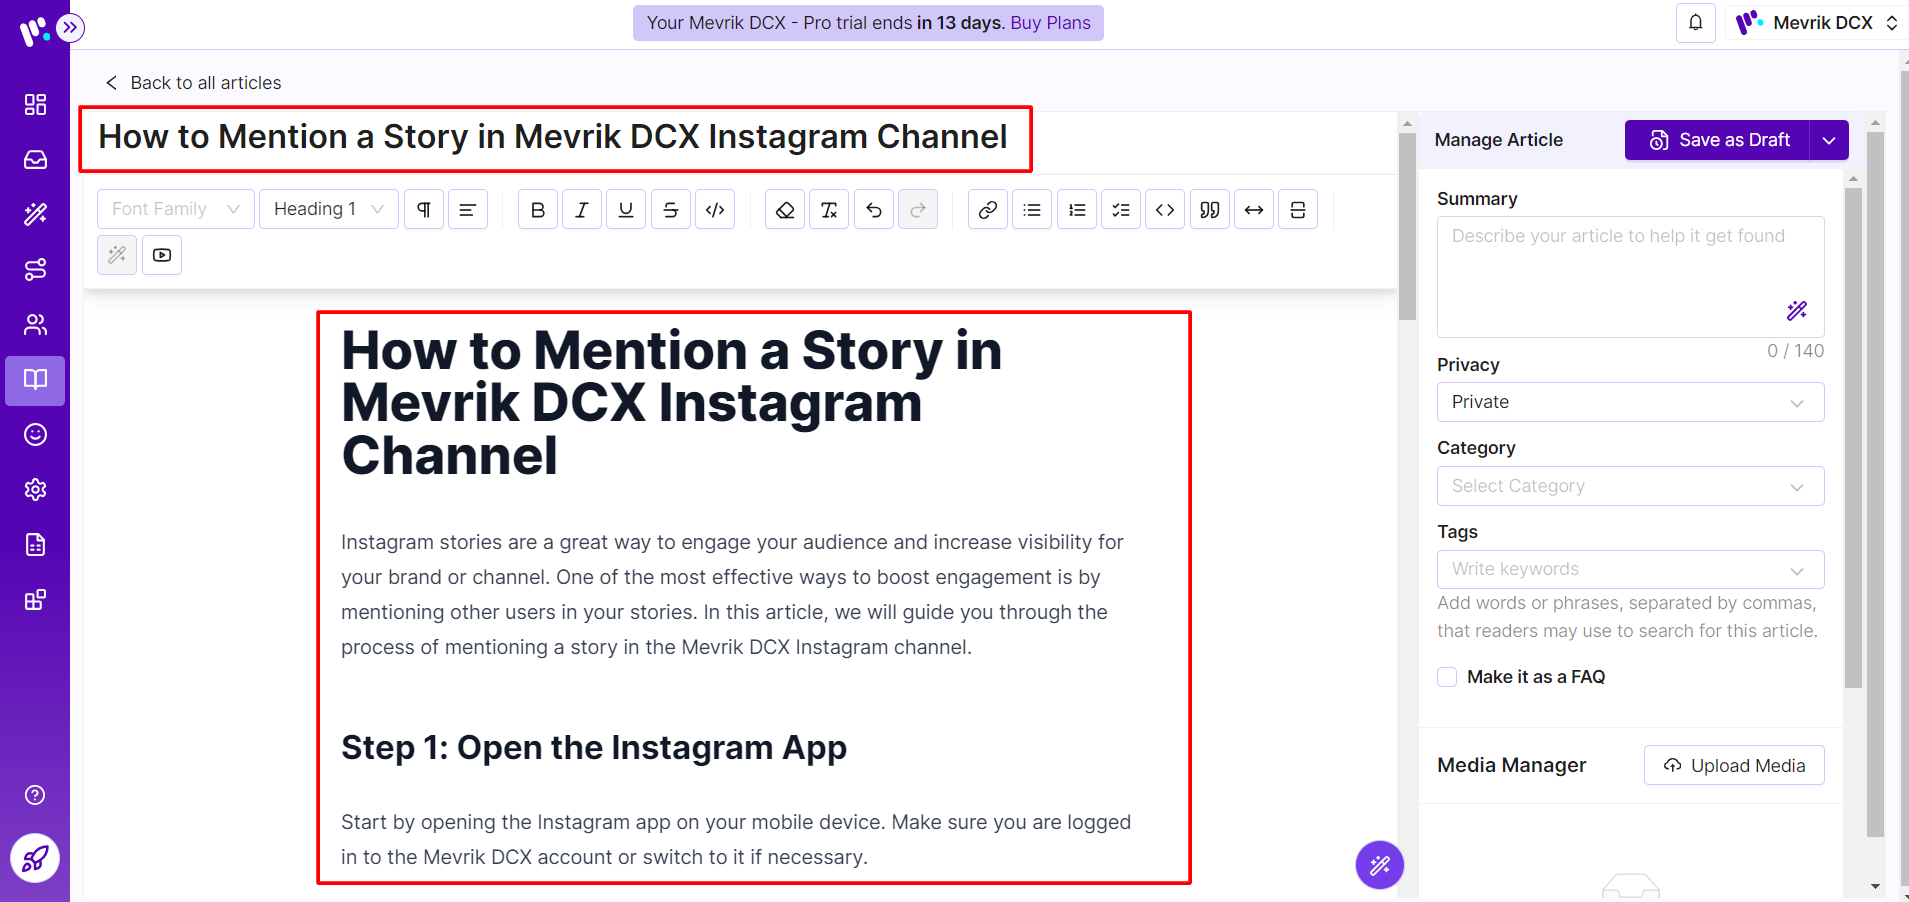
An article will be auto generated with precise title and description.
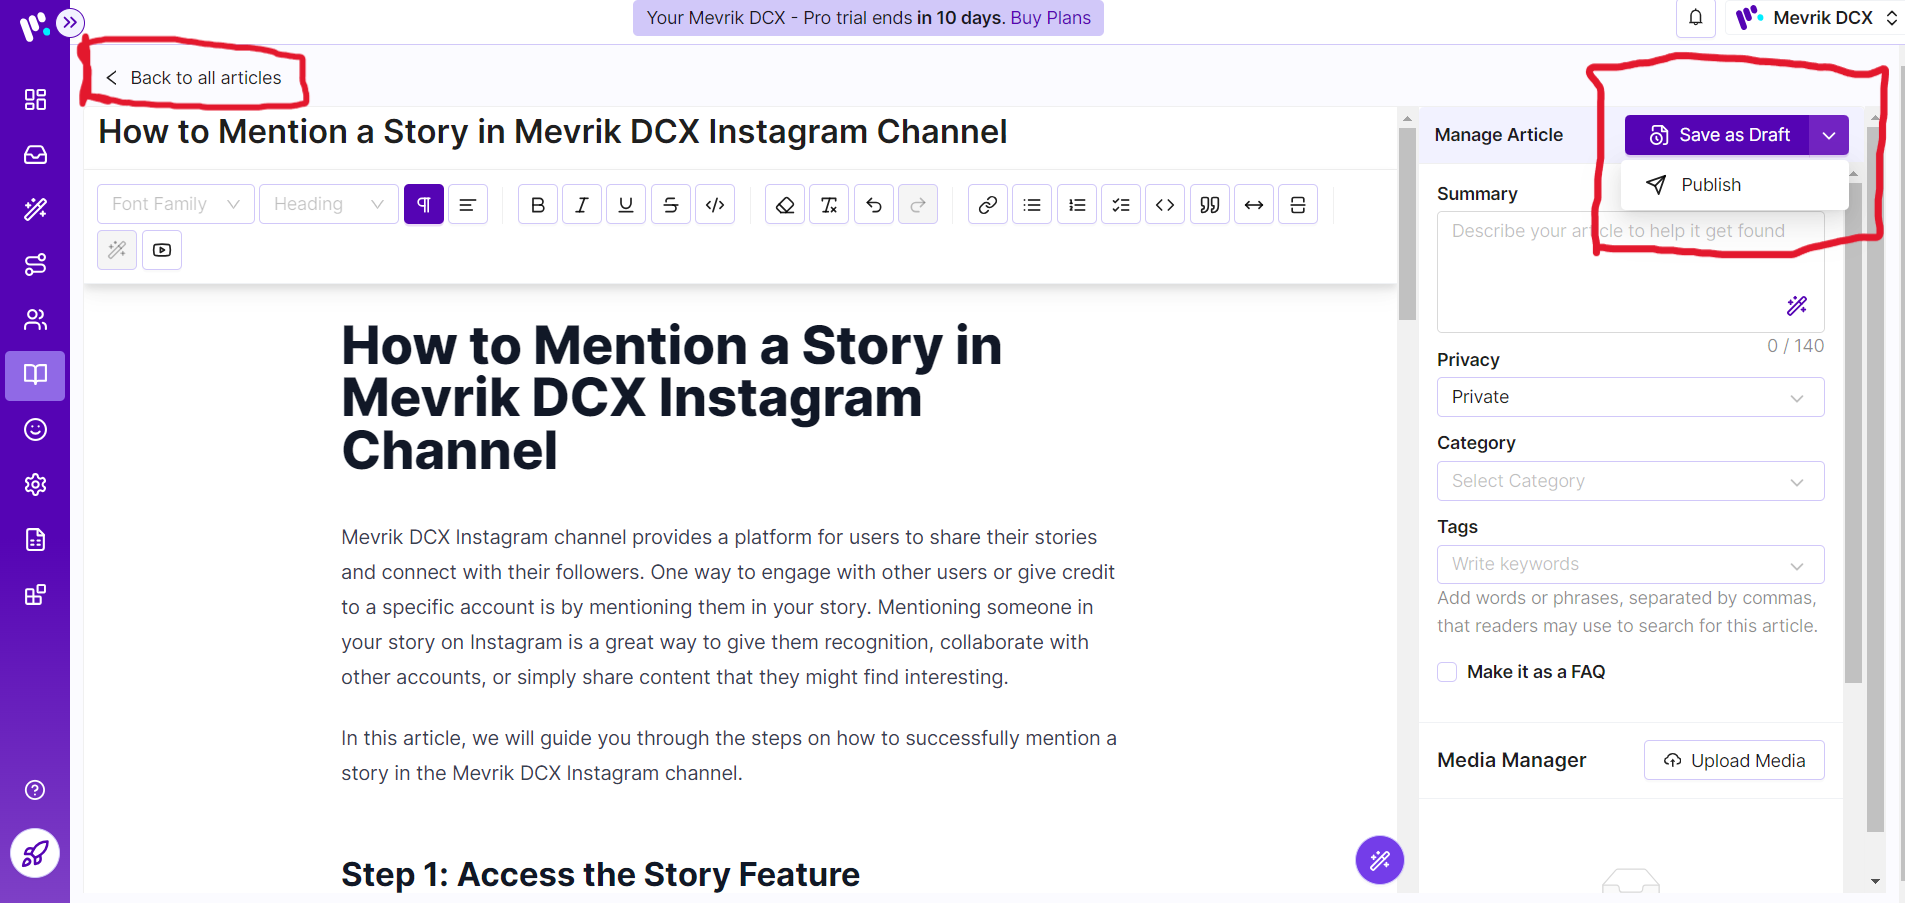
After creating it for save the article, Click on "Publish" button for save it. Click "Back to all Articles" link to go back to the article list.
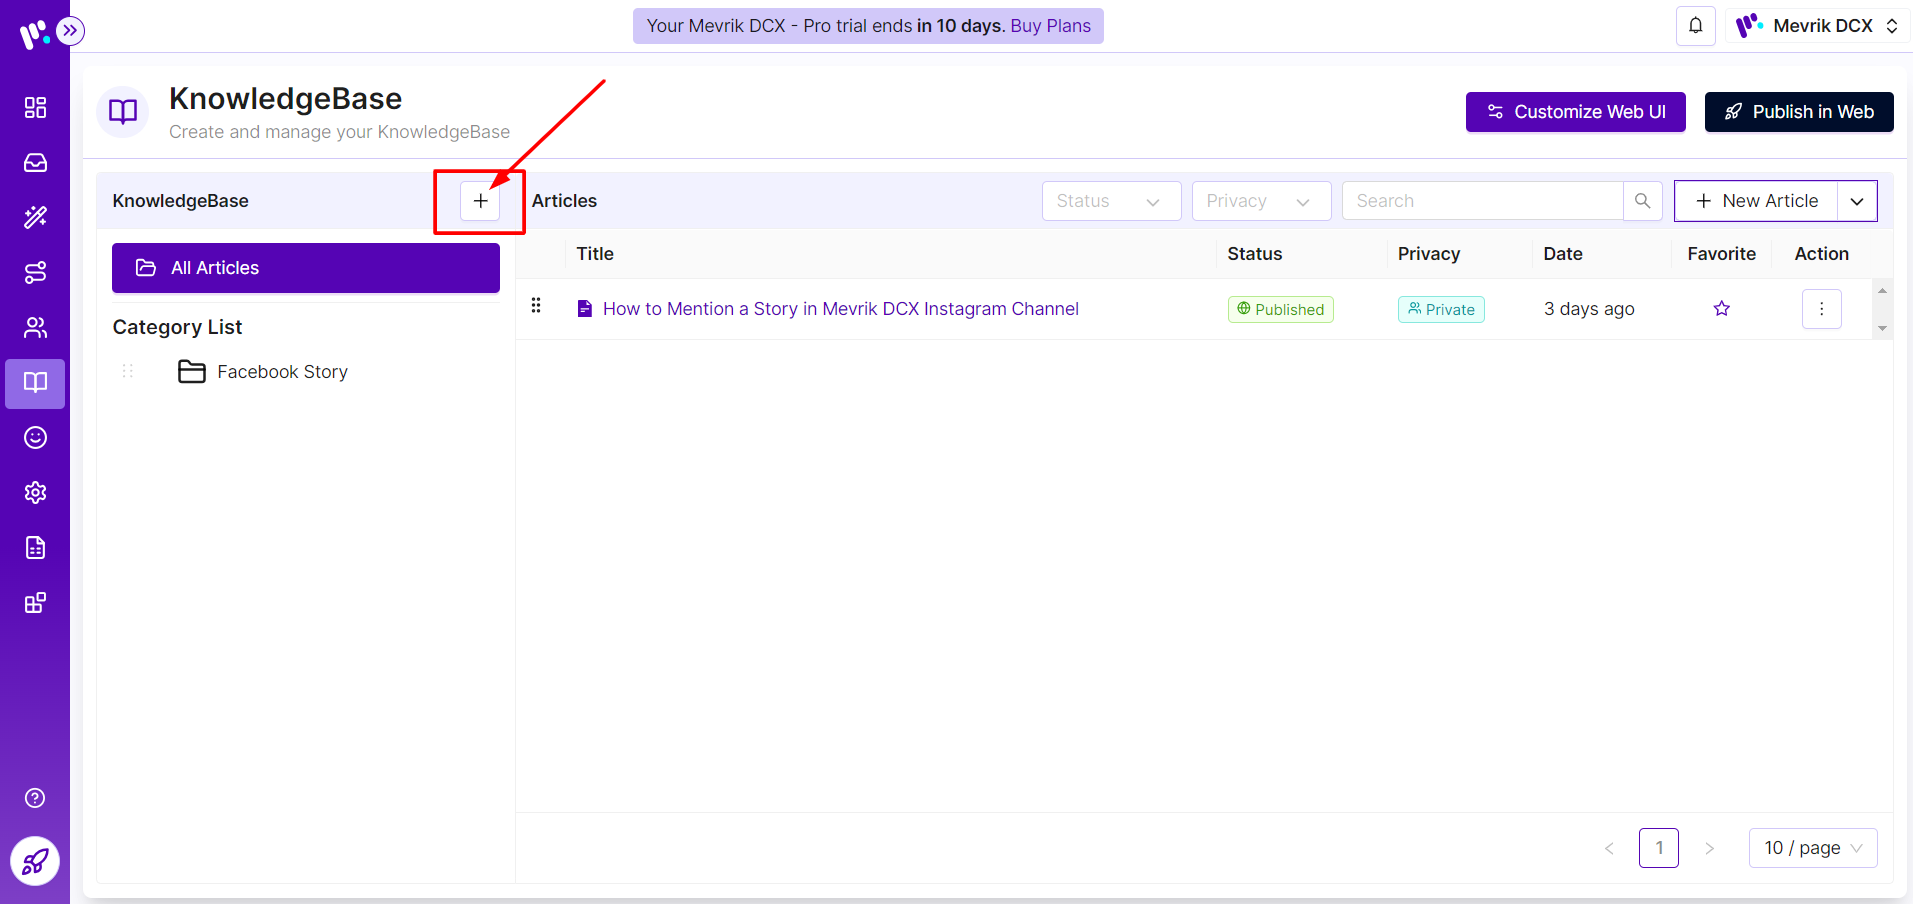
Step-4: For creating a 'New Category' follow the below steps:
Click on 'Plus' icon for creating a new category.
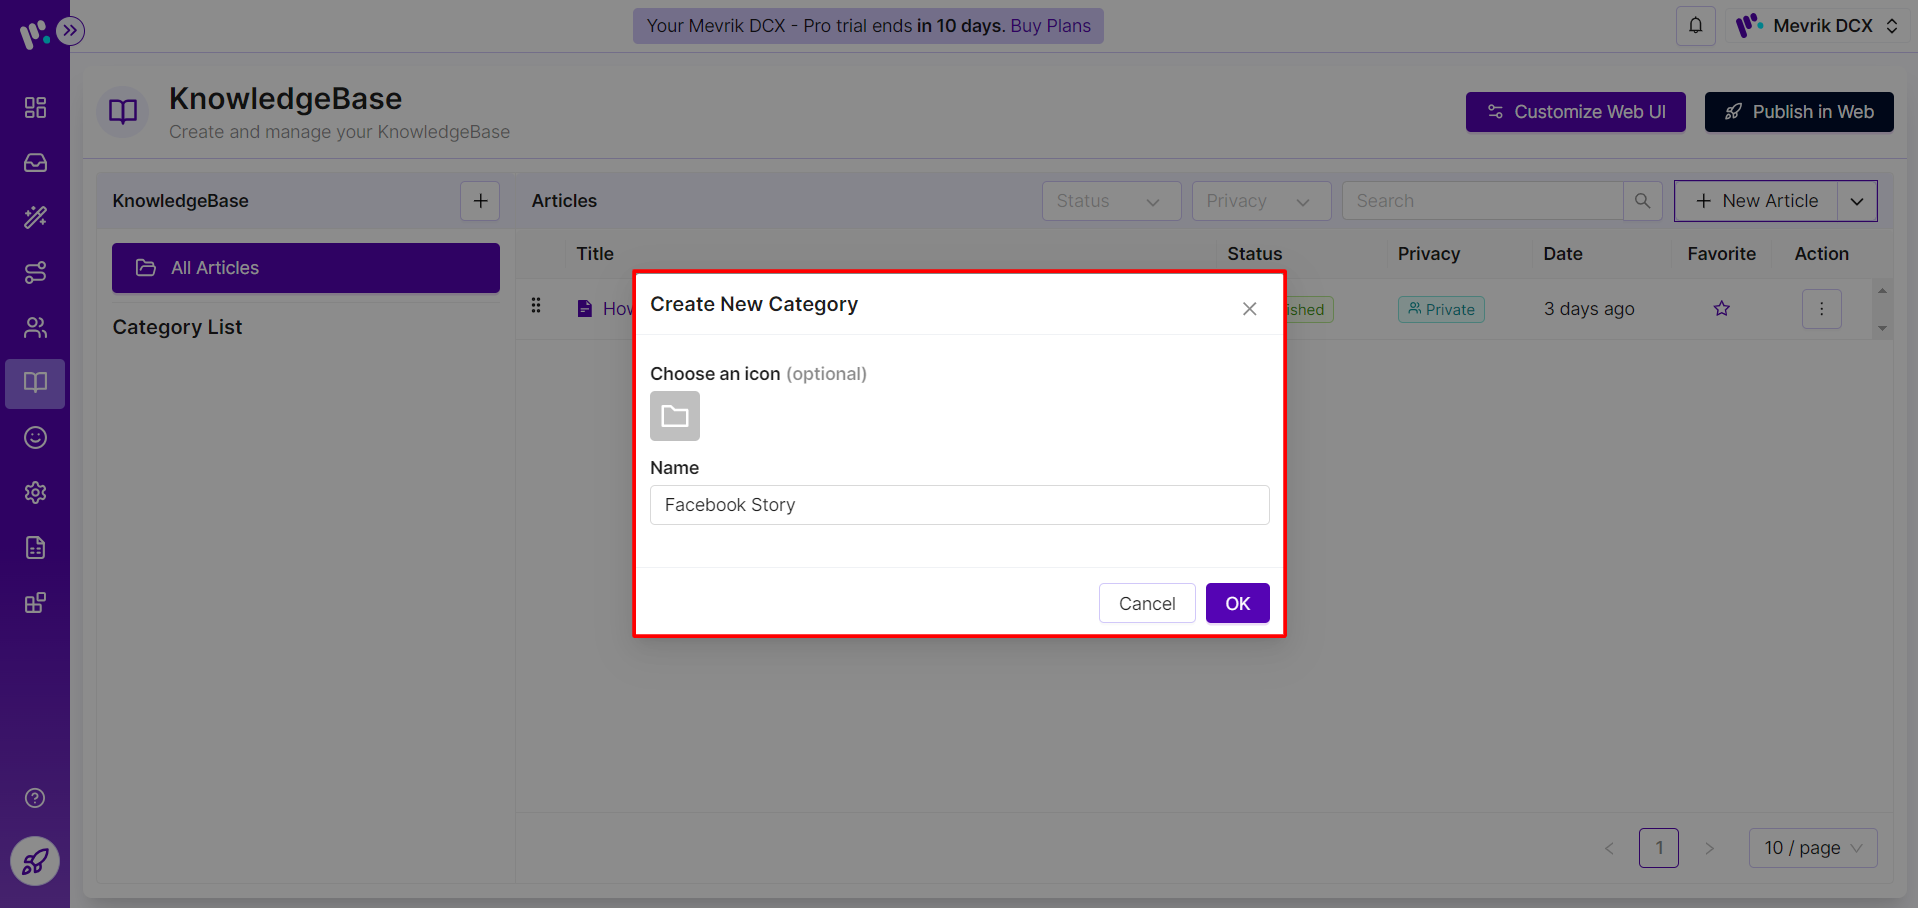
Write the title of category name and click on 'OK'.
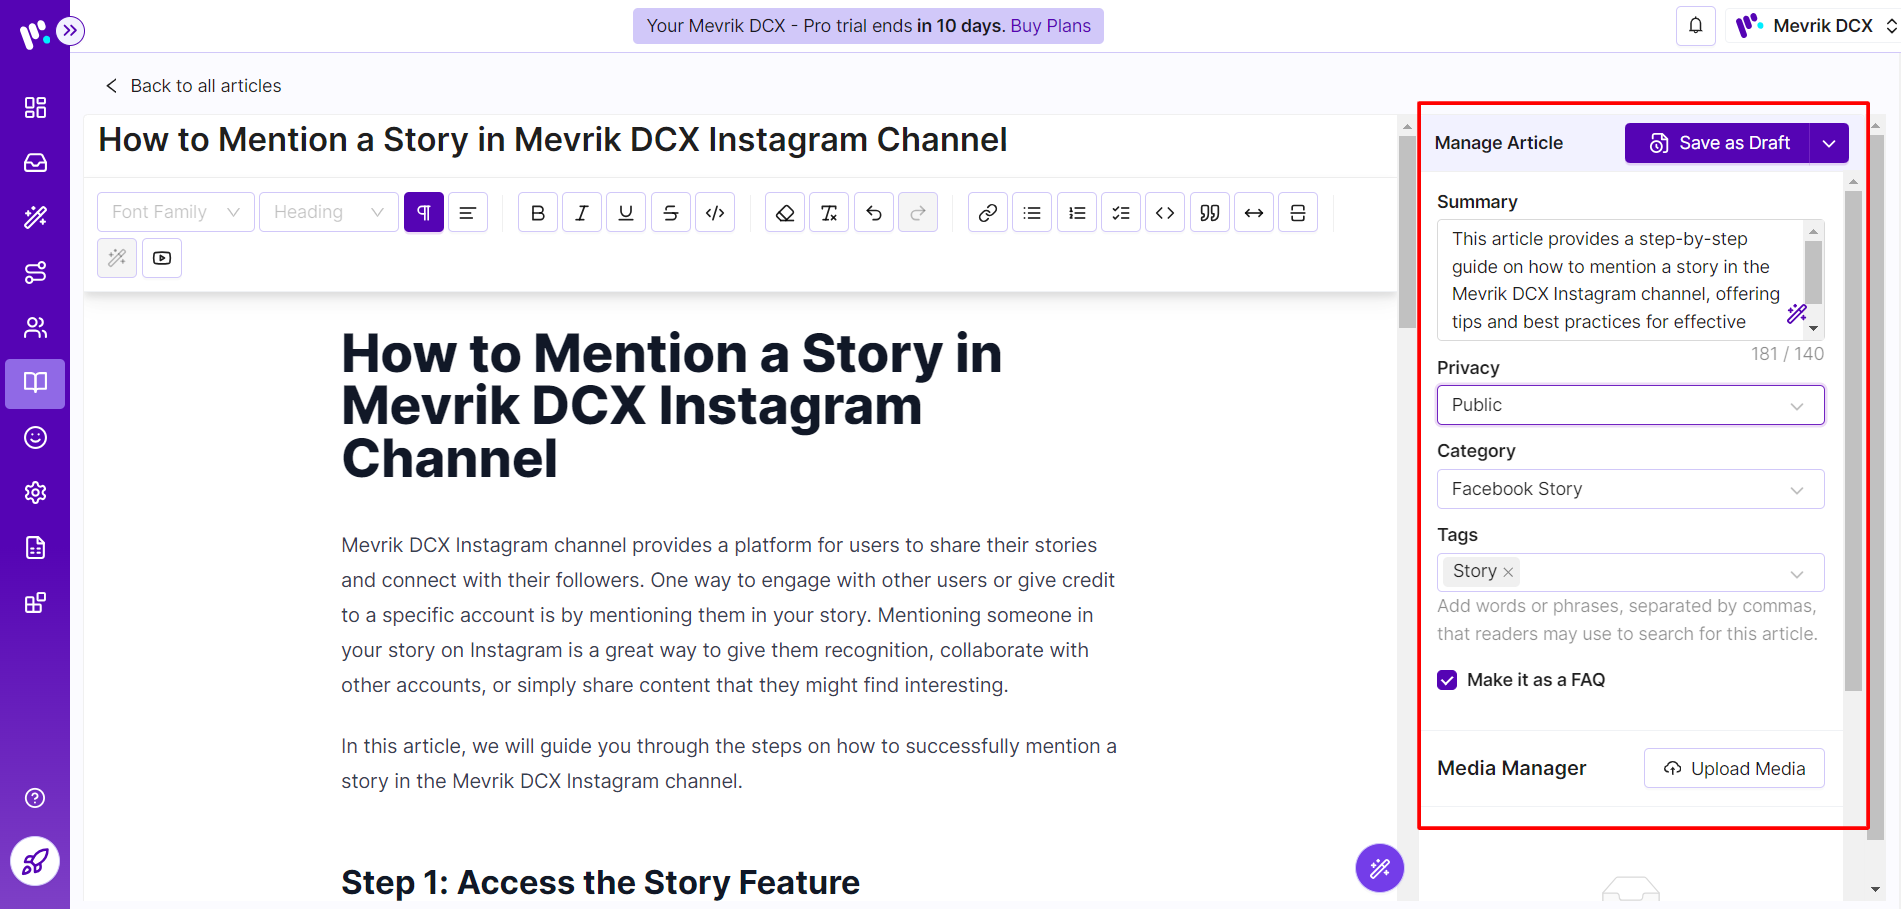
By using 'Mevrik AI' feature write a auto-generate summary. From 'privacy', you can set the article settings as public or private. You can select the category and set an tags. By tik on 'Make it as a FAQ' you can publish the article as a FAQ. From upload media button, you can add a media file.
Click 'Plus' icon after adding an image to insert it in the articles.

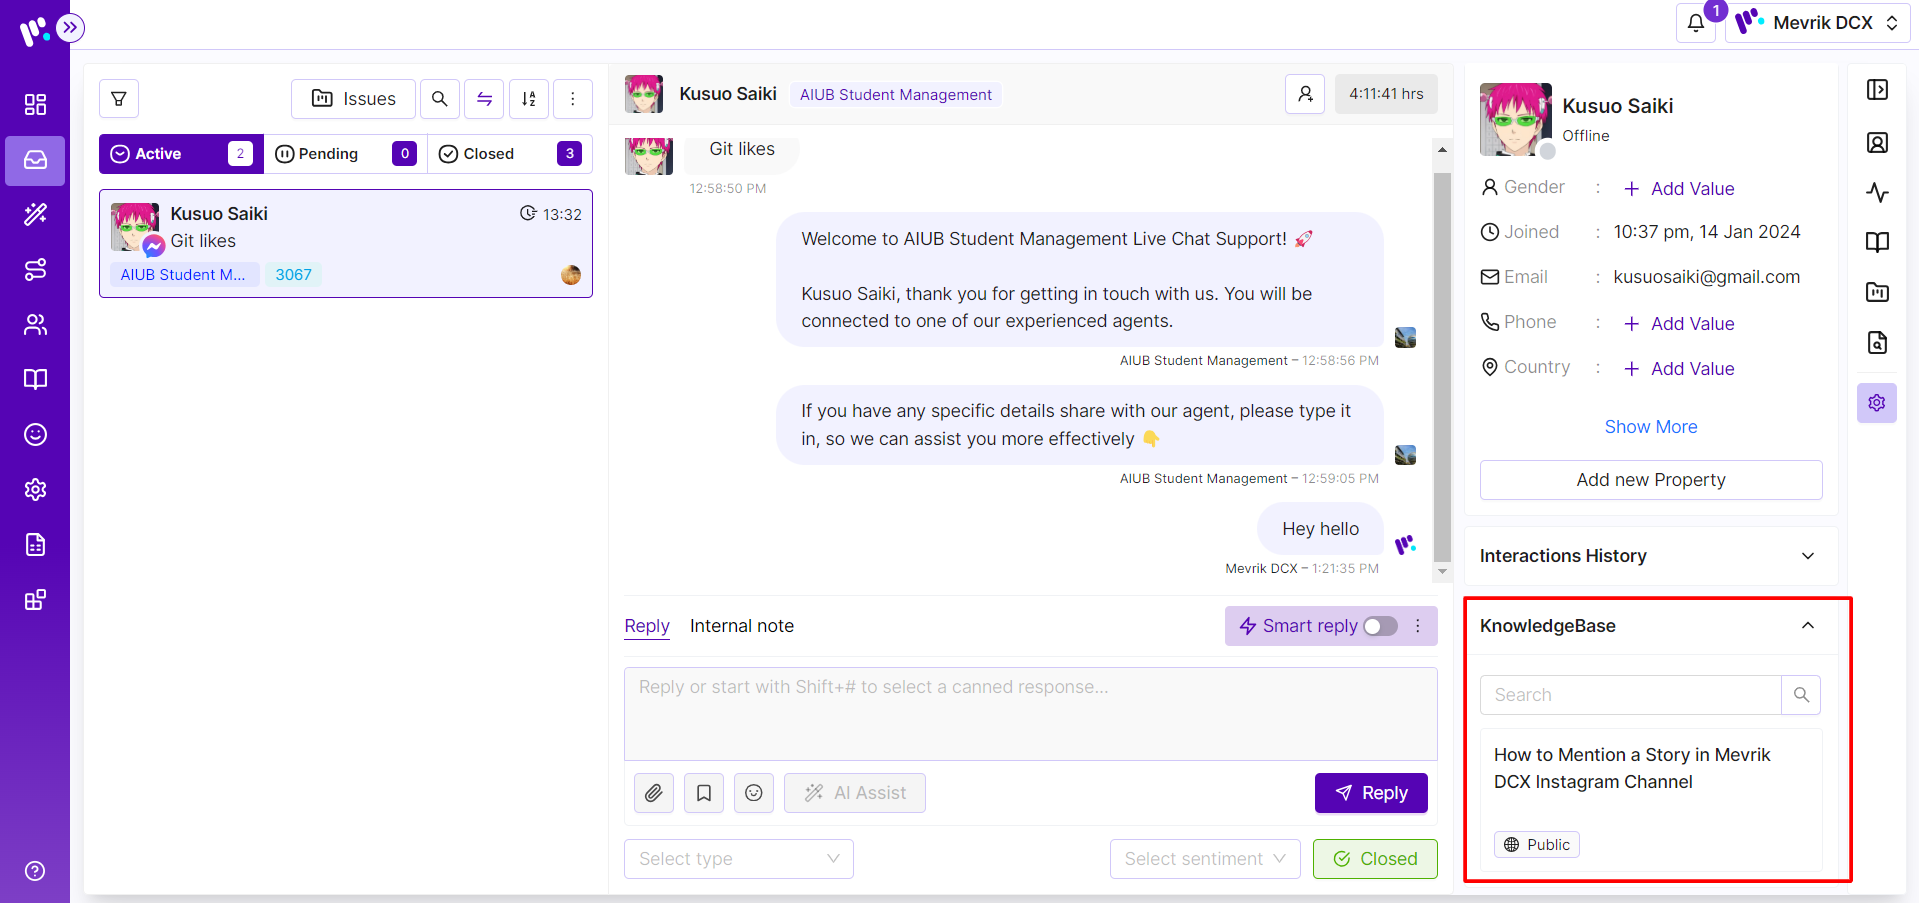
After adding articles and publish them user will get to see all the articles list in unified Inbox if anyone expand 'Knowledgebase' field.
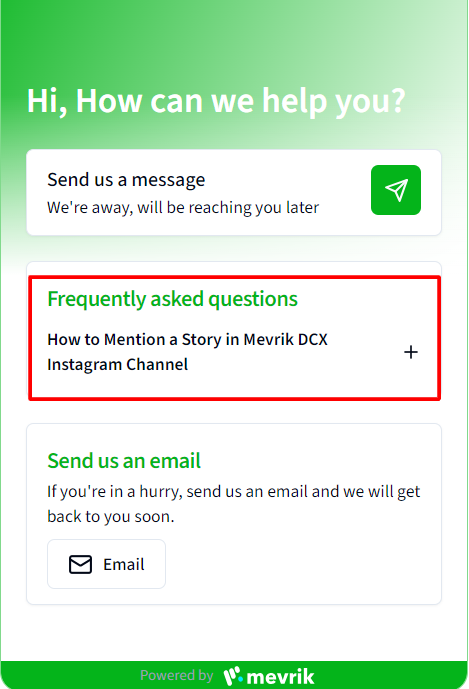
You can create an article as a FAQ and after publish it, the FAQ will get to see in your widget channel. For that, Go to your widget channel-> Click on 'Docking Script'-> Click on 'Live Preview'. The added FAQ list get to see here.
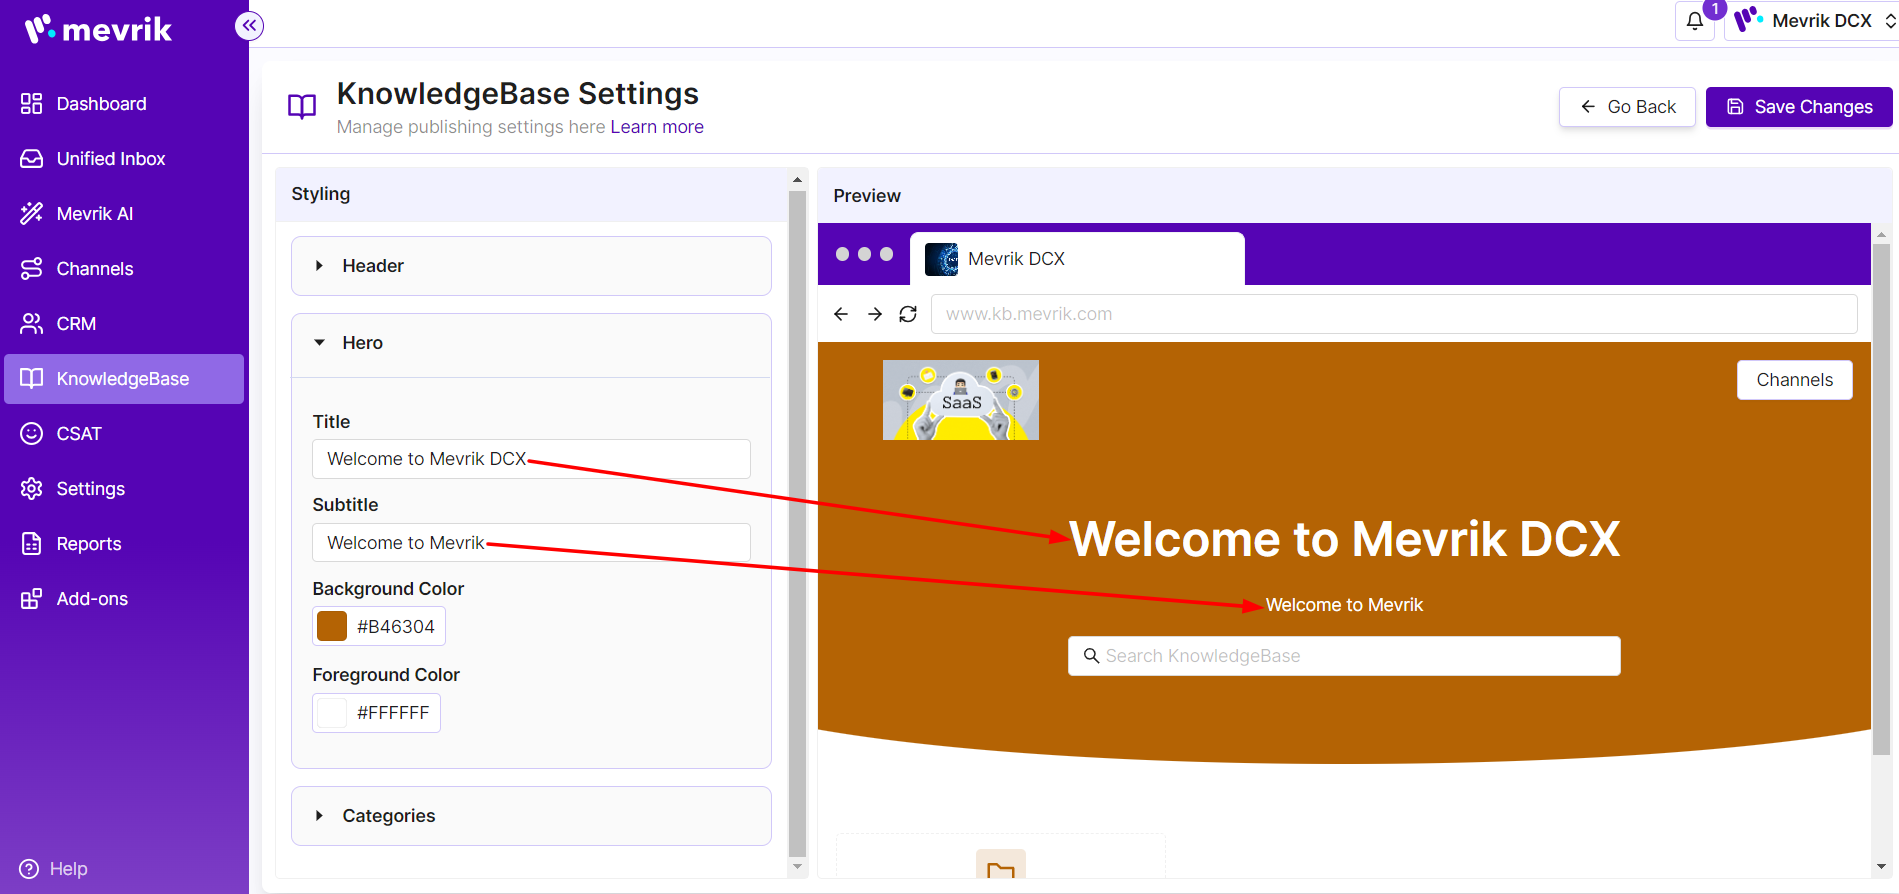
You can create your 'Customize Web UI' as per your requirements by using our feature. Click on "Customize Web UI" feature to customize.
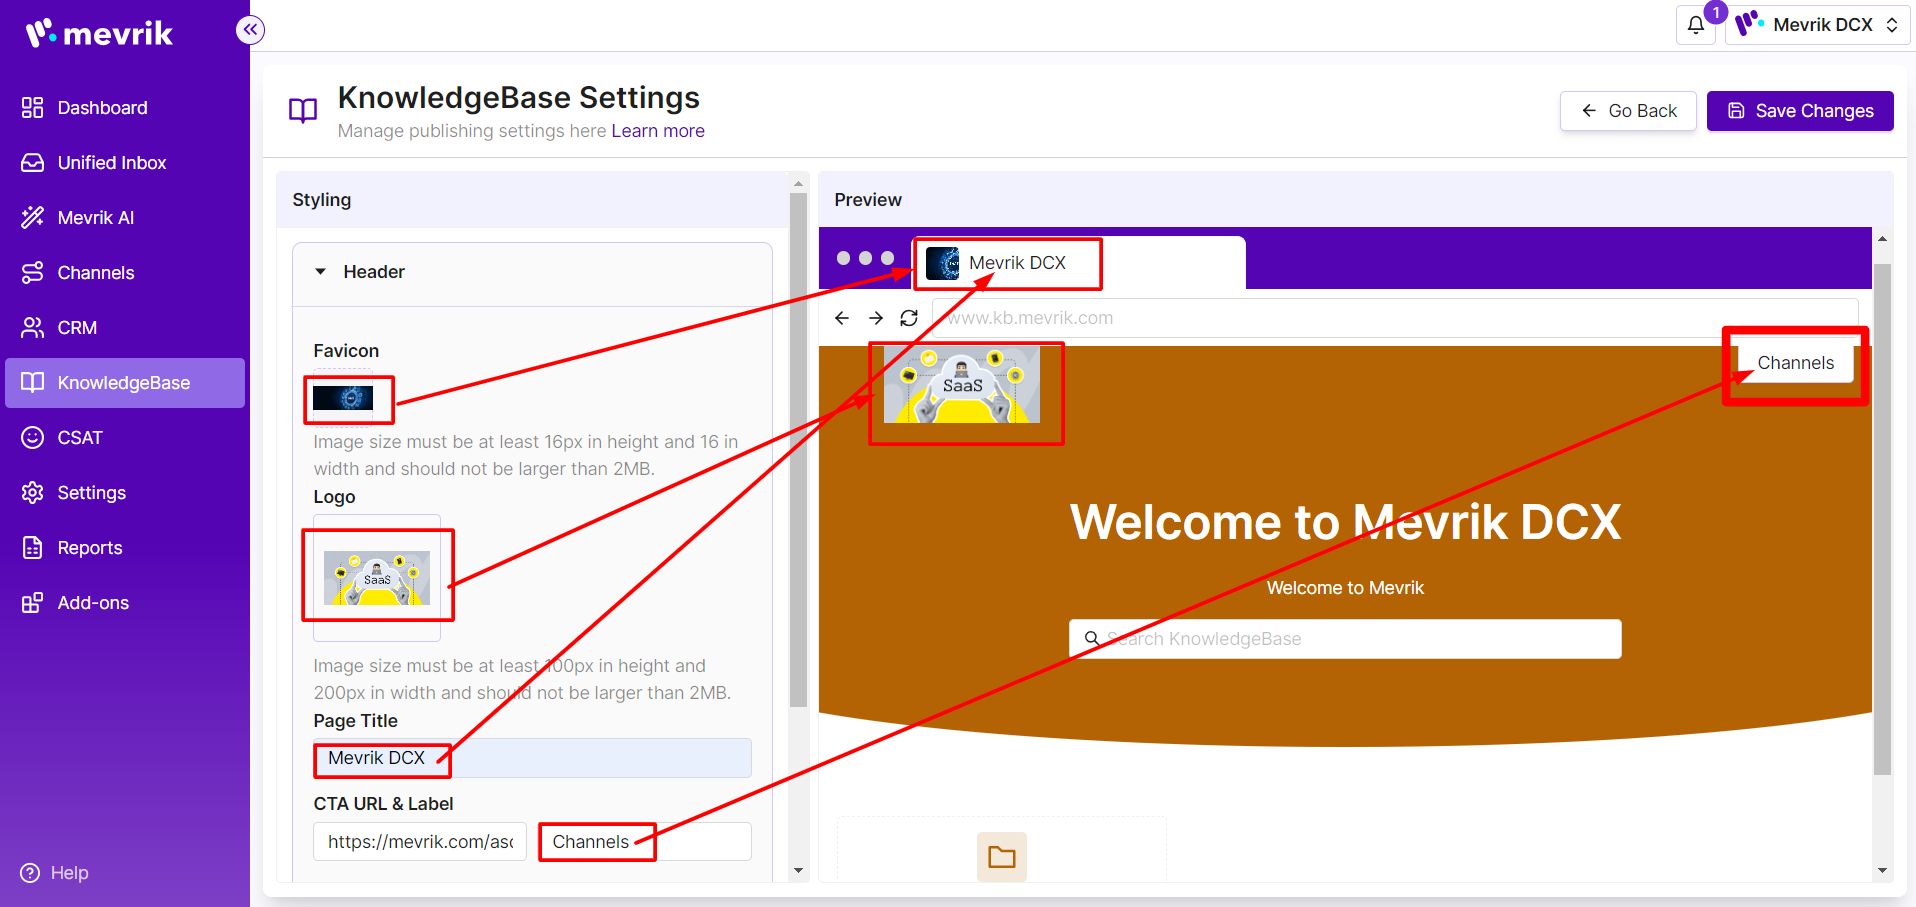
From the attached image you can see whatever changes I made in my marked field all has changed as per it. Just fill the field as instructions as like pictures.
To change the 'Category' description click on the Edit button.
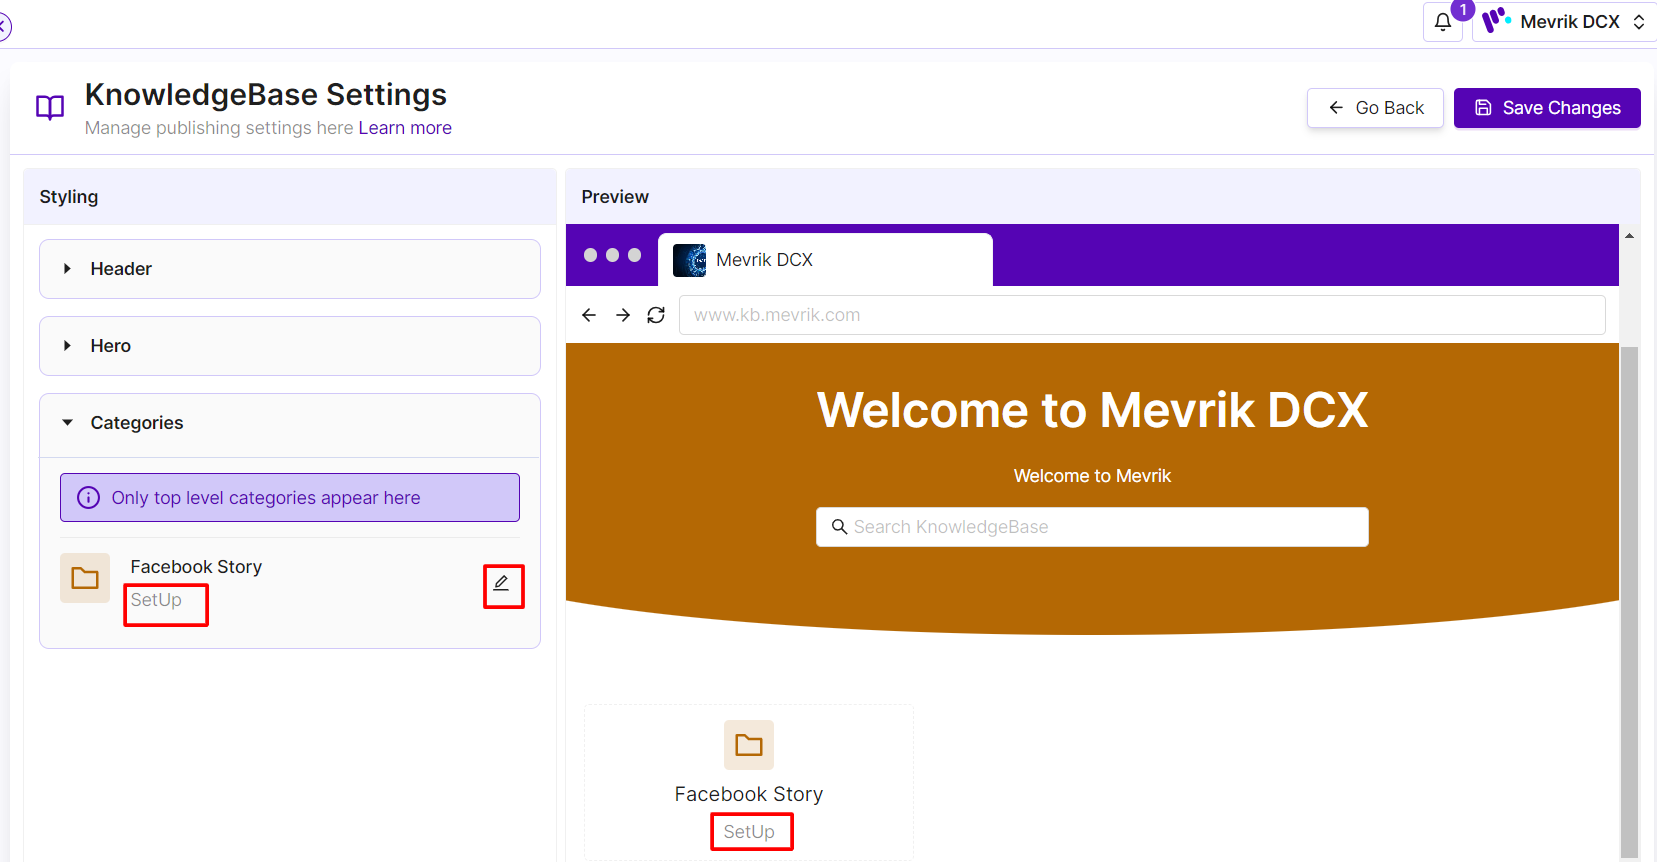
After made the changes in description and save it you can change the description from there.
To add icon in your categories click on the icon and set an icon:

Now, the Web UI you have created can see the website from 'Publish In Web' feature. Expand 'Website Publishing'-> Turn on the toggle-> Click on the link which will redirect you the website you have create.