Overview
The Users Module in Mevrik DCX empowers Business Admins and Supervisors to seamlessly invite, manage, and monitor users for customer service operations.
User Invitation Process:
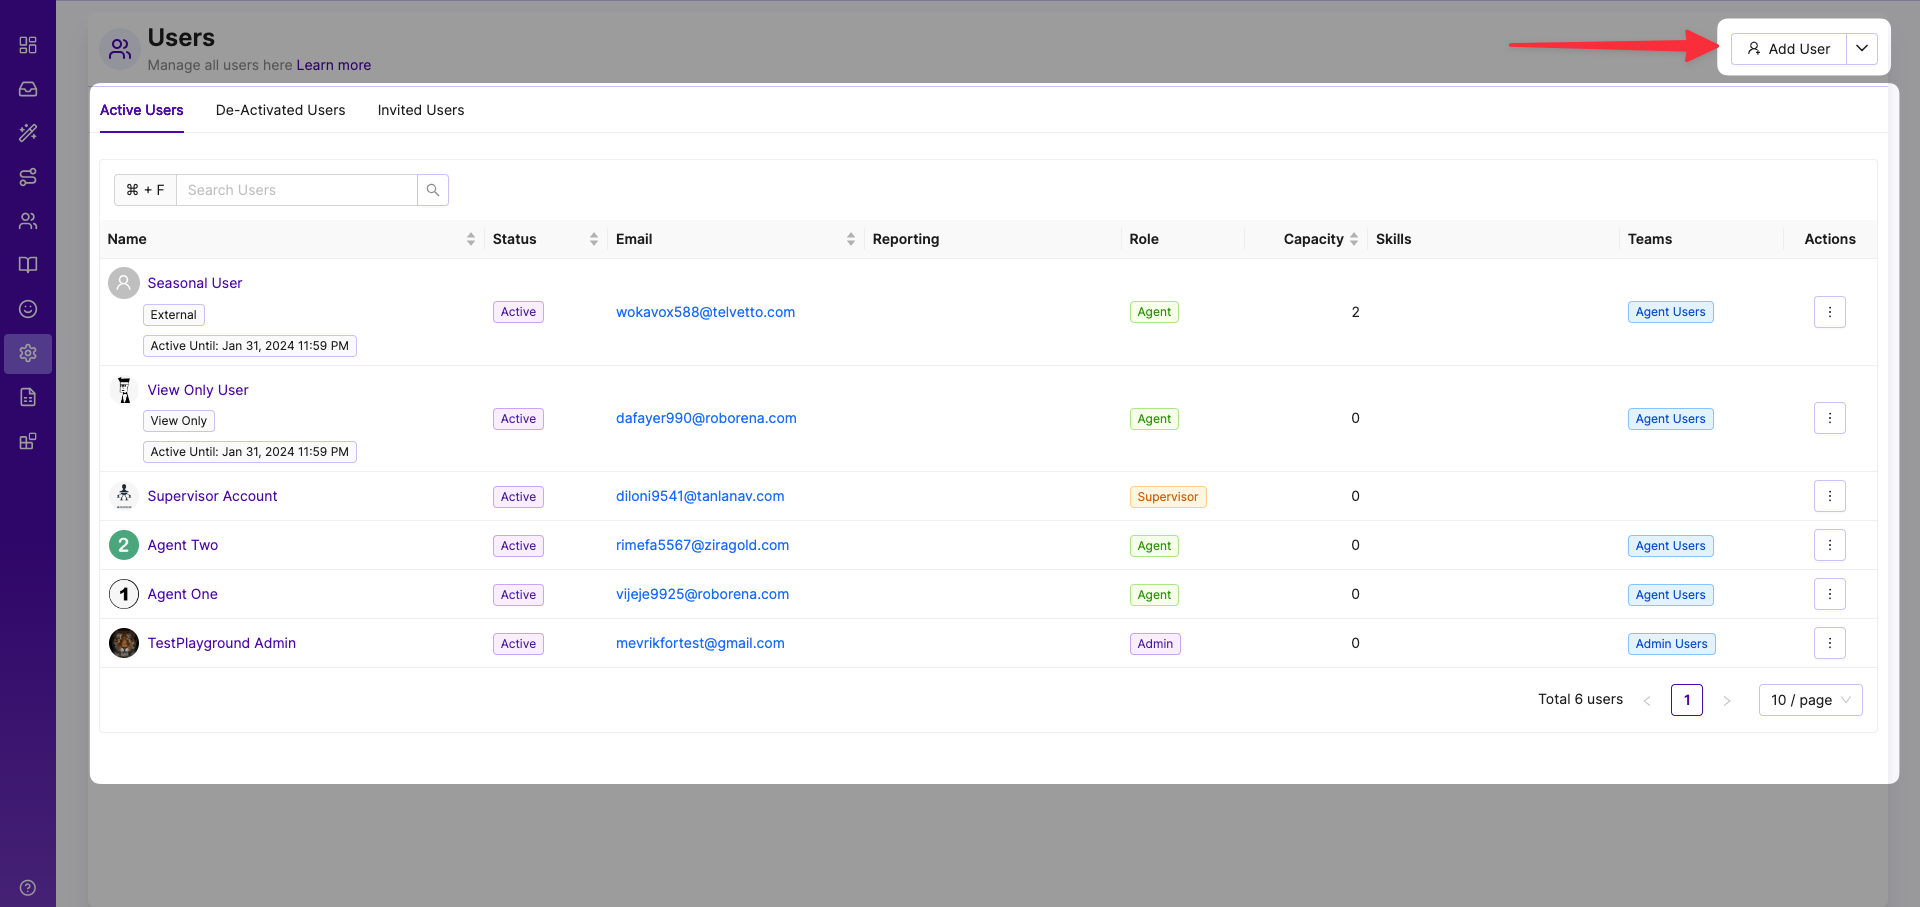
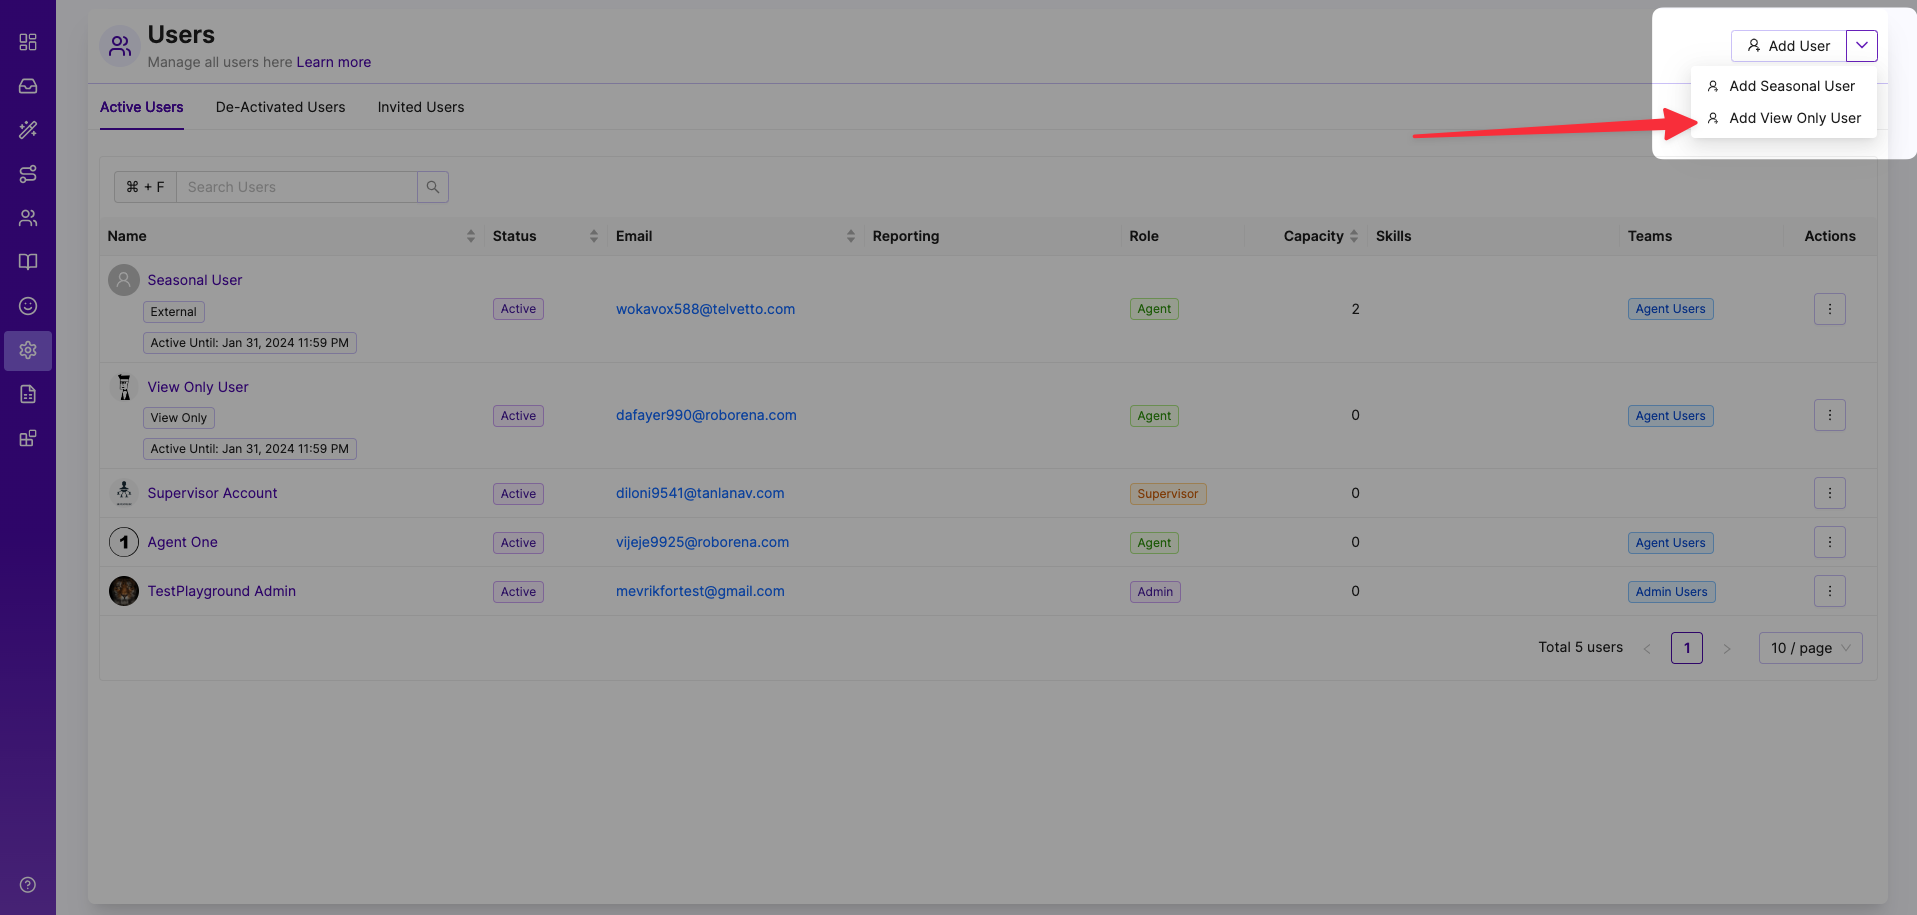
Go to Settings -> Click "User" Option -> Press "Add User" button.
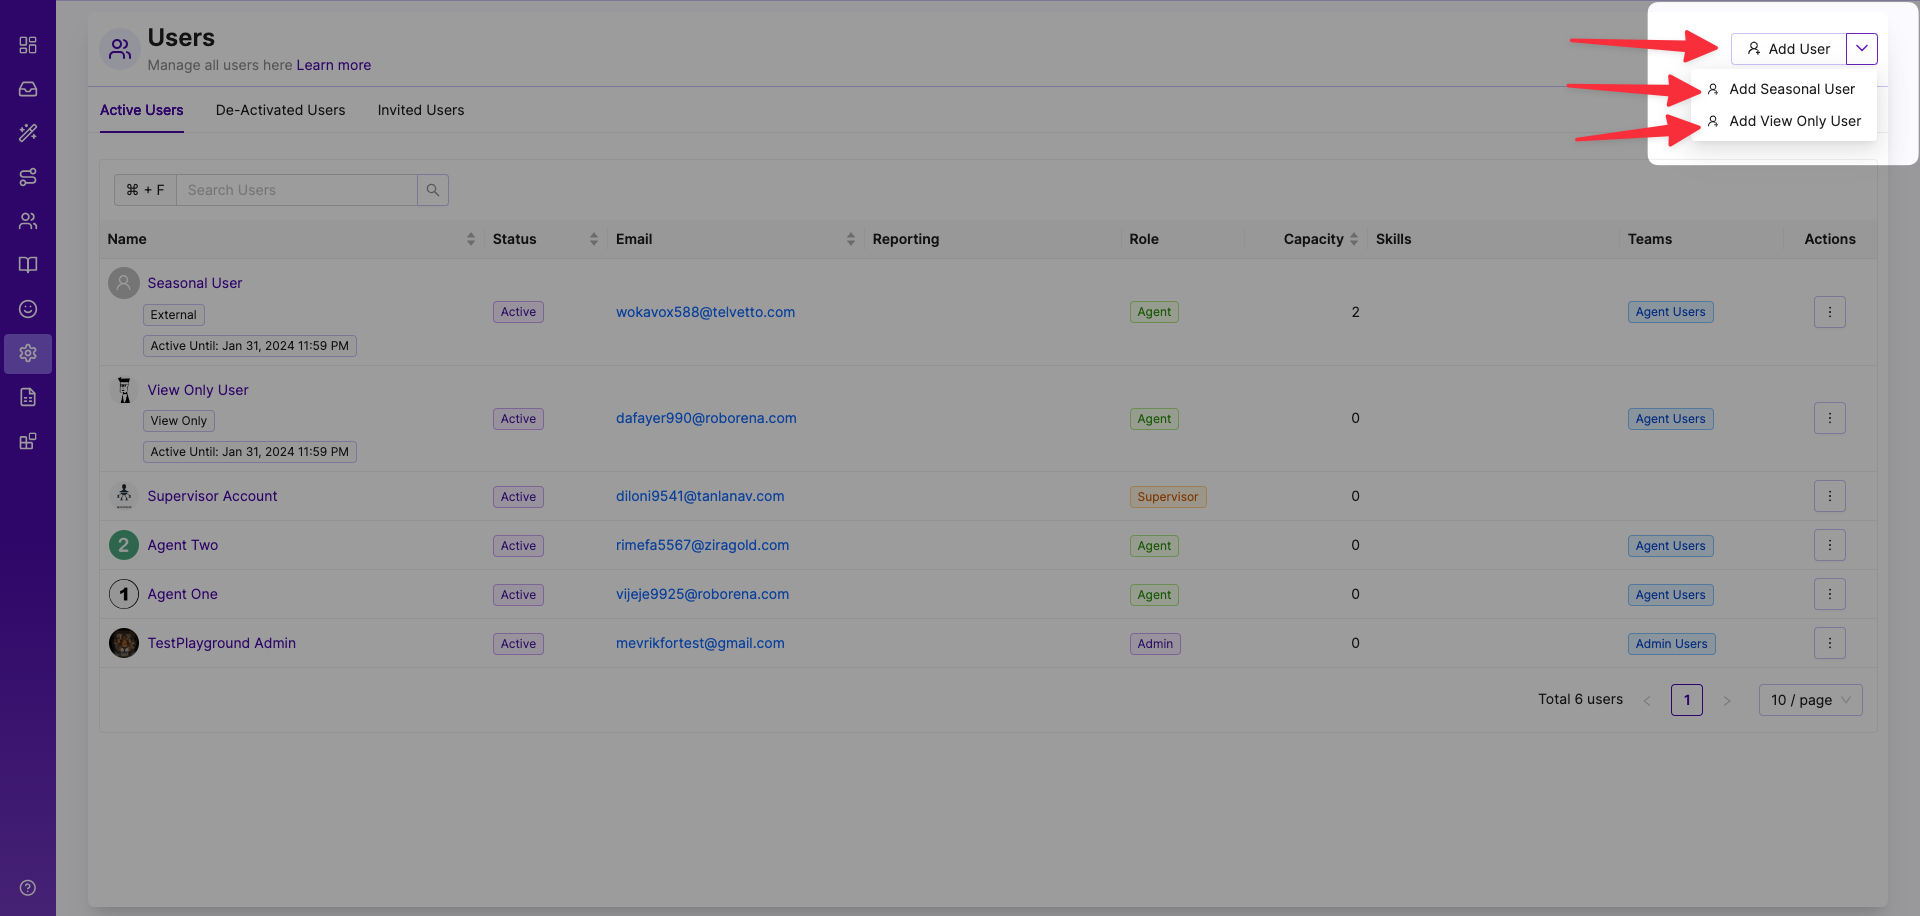
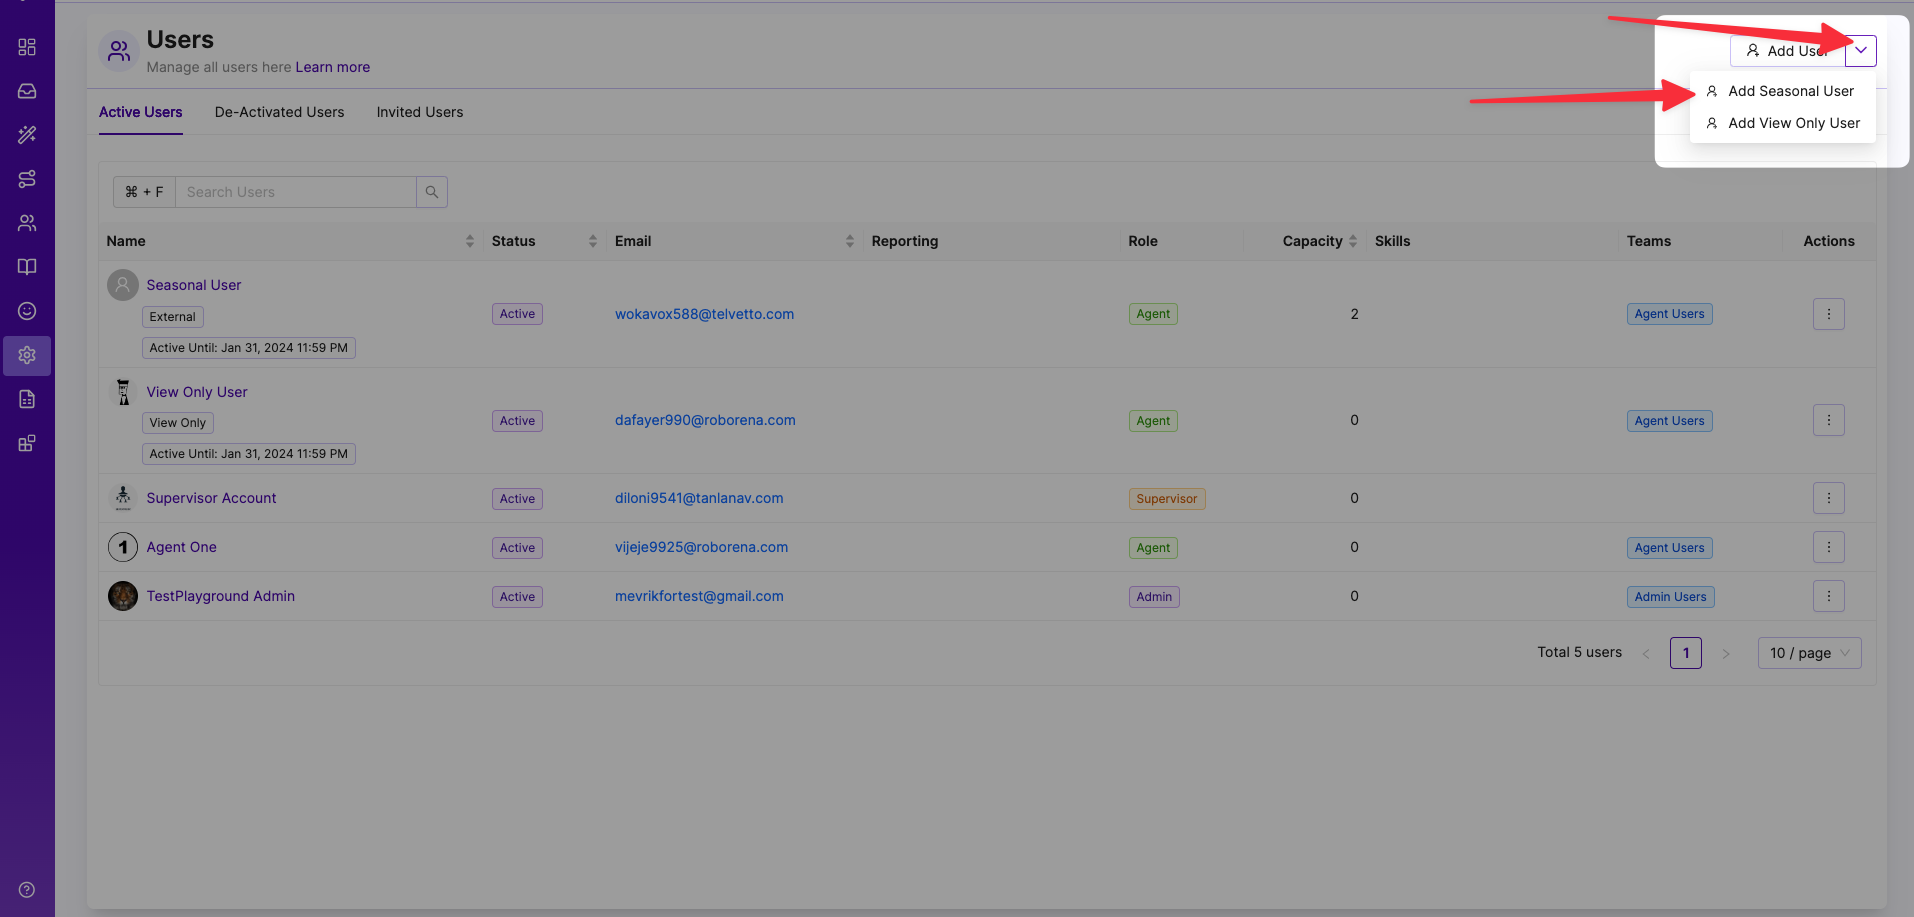
From add user we can add Three types of users.
- Add User (Agent, Supervisor)
- Add Seasonal User (A person who has agent-like access to the tools)
- Add View Only User (The person you invite will only be able to see the tools but will not get any access like an agent or seasonal user)
Add User
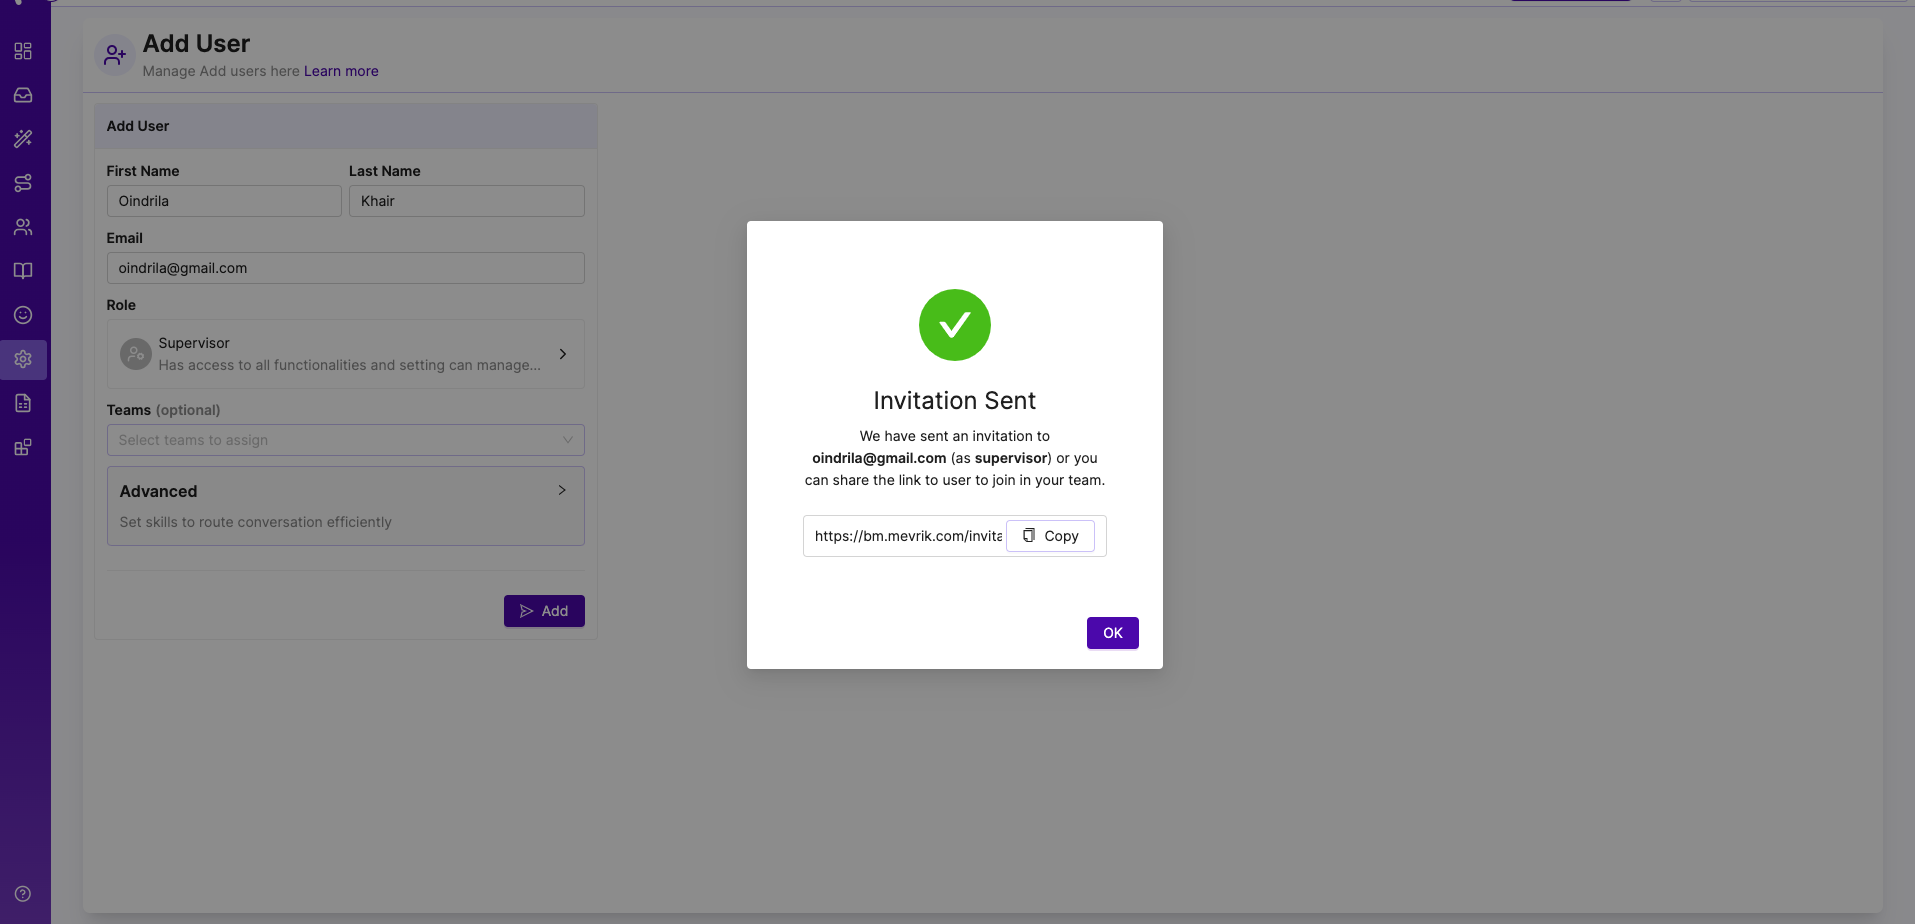
Click "Add User" User Details: Business Admins and Supervisors initiate the process by providing the user's "first name, last name, and email address".
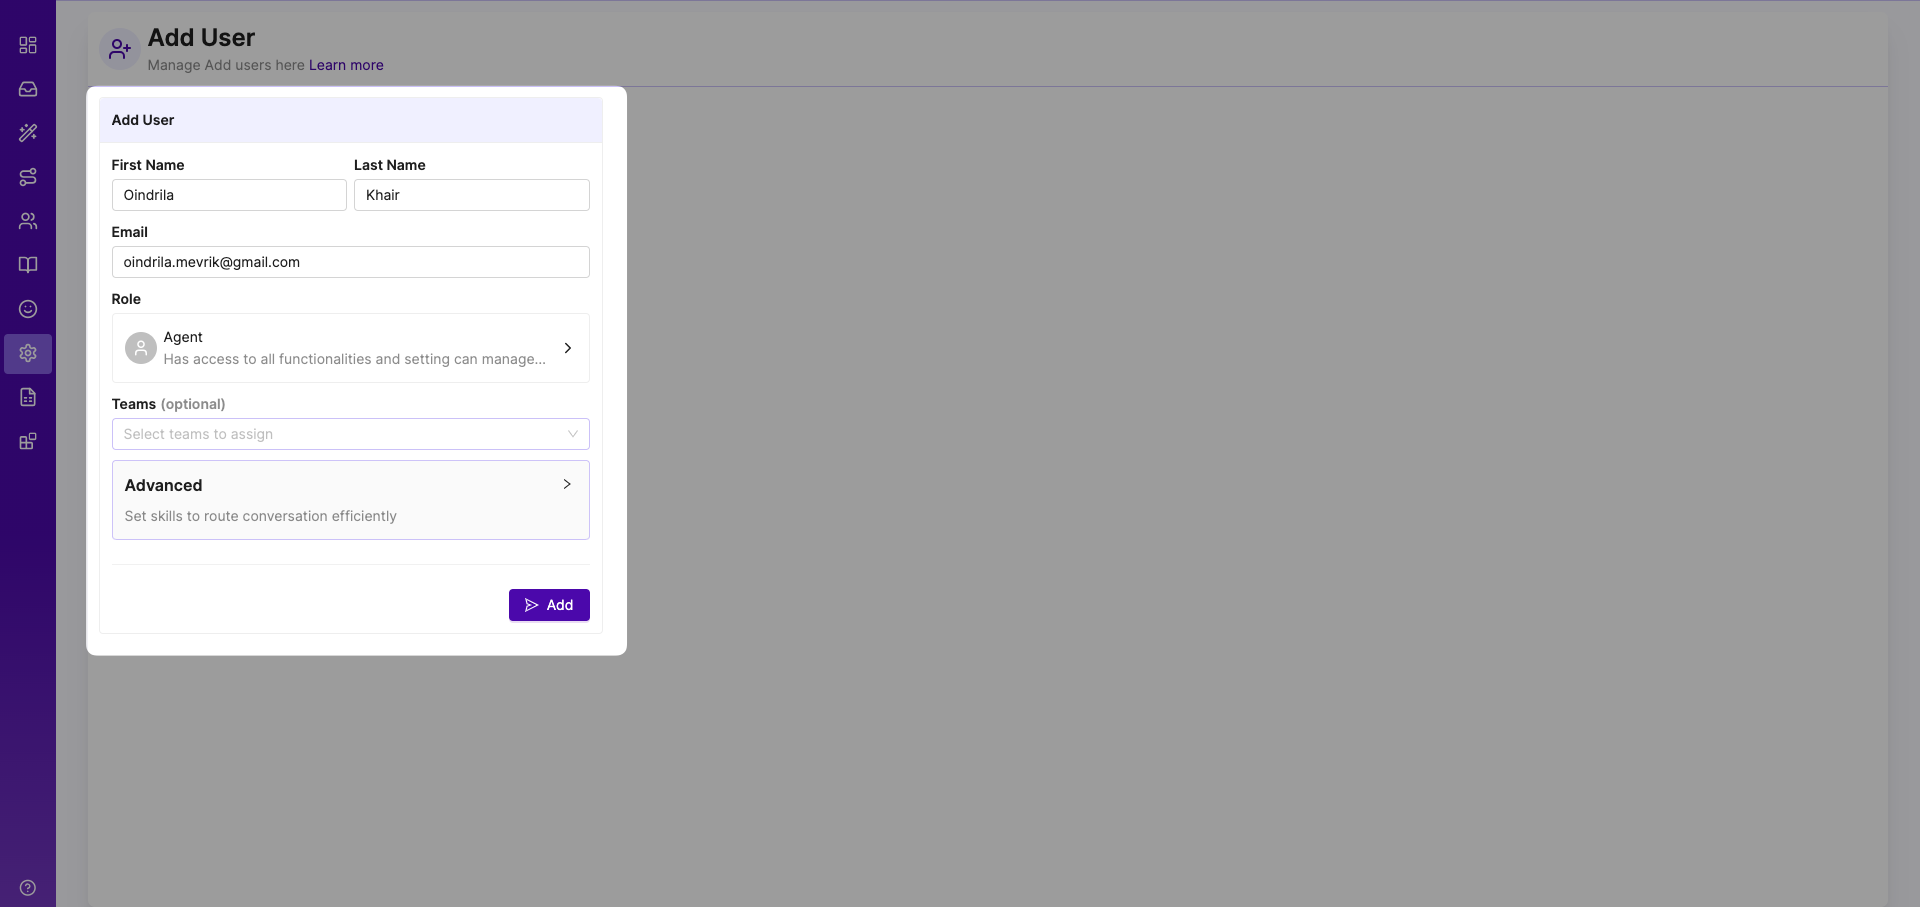
Role Selection: The inviter selects the user's role from the default roles: Admin, Supervisor, and User (Agent). Supervisors can only invite Users (Agents), not other Supervisors.
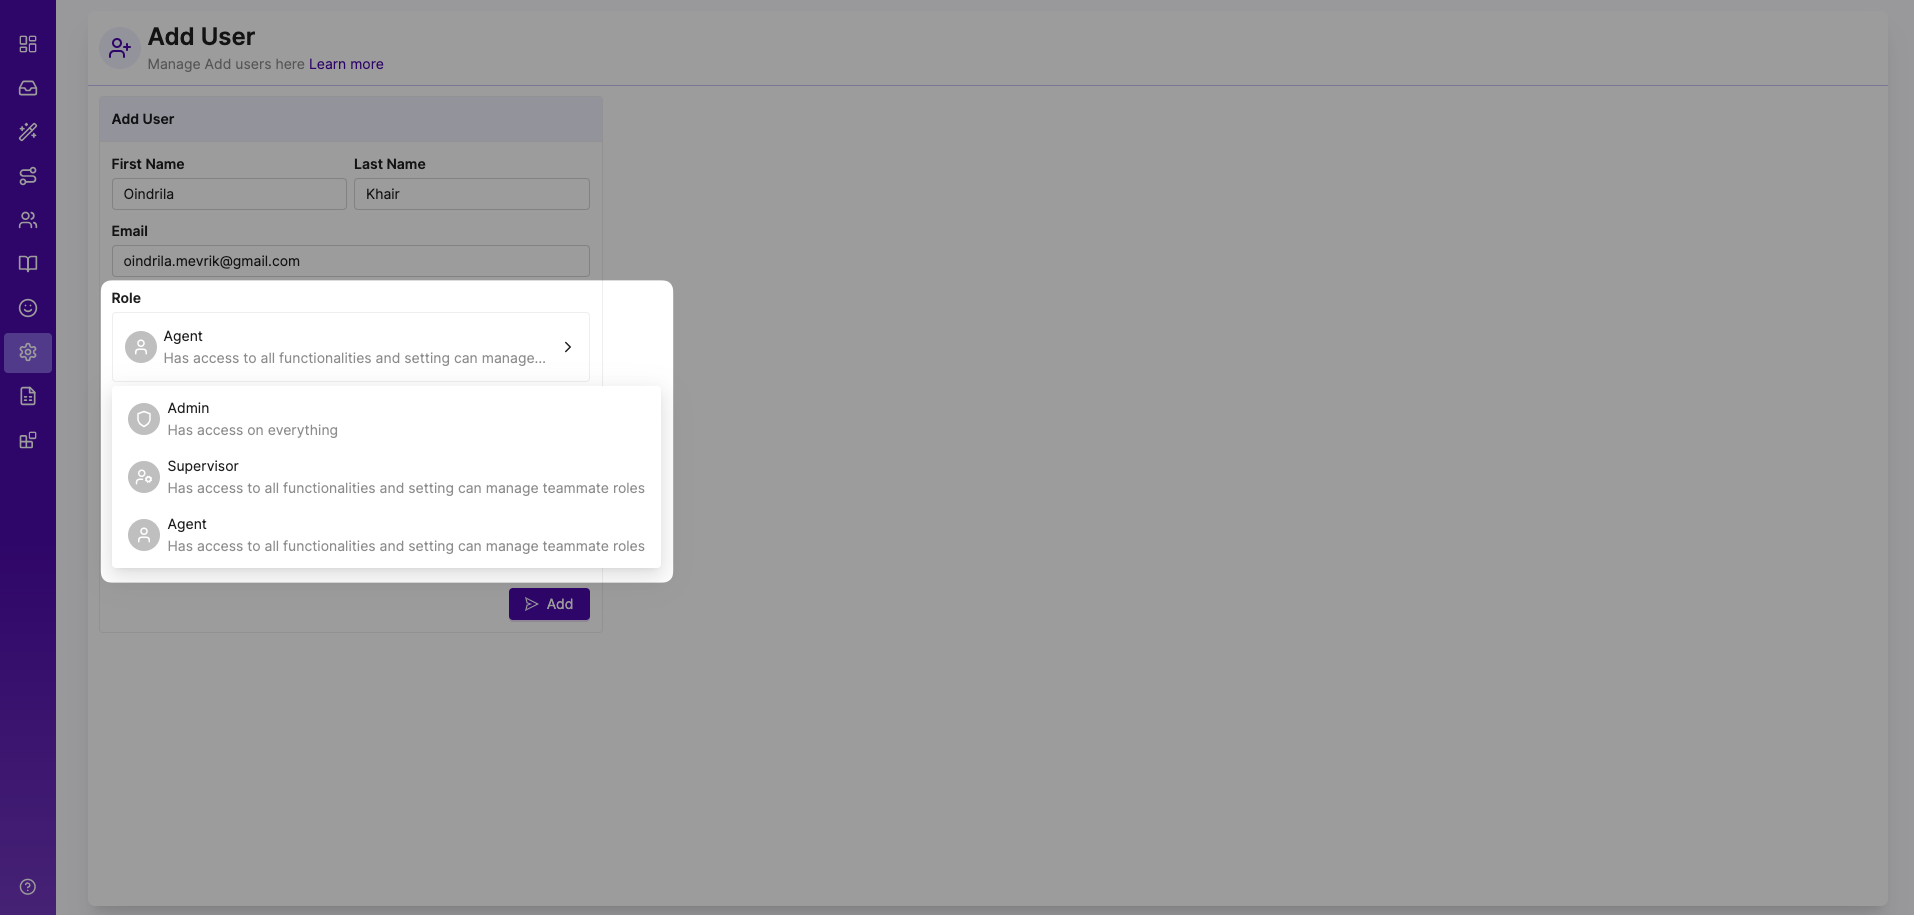
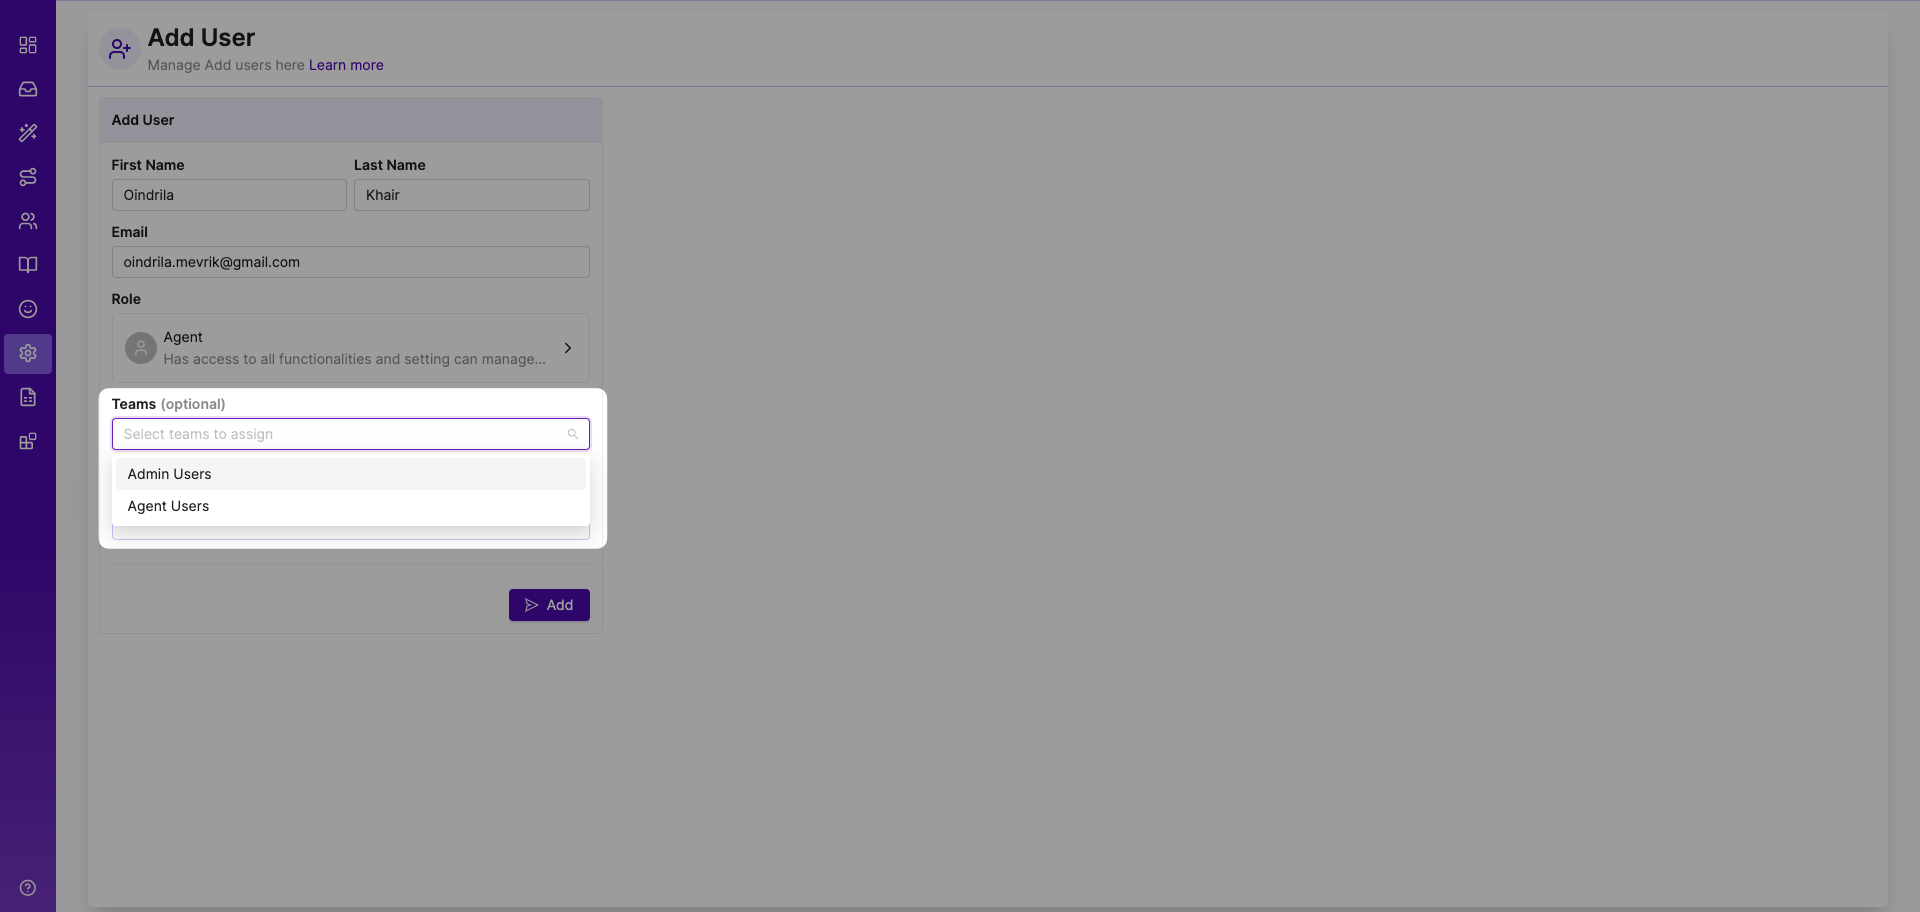
Team Assignment (Optional): Teams can be assigned to users for better organization and collaboration. This step is optional and helps in segmenting users based on specific projects or tasks.
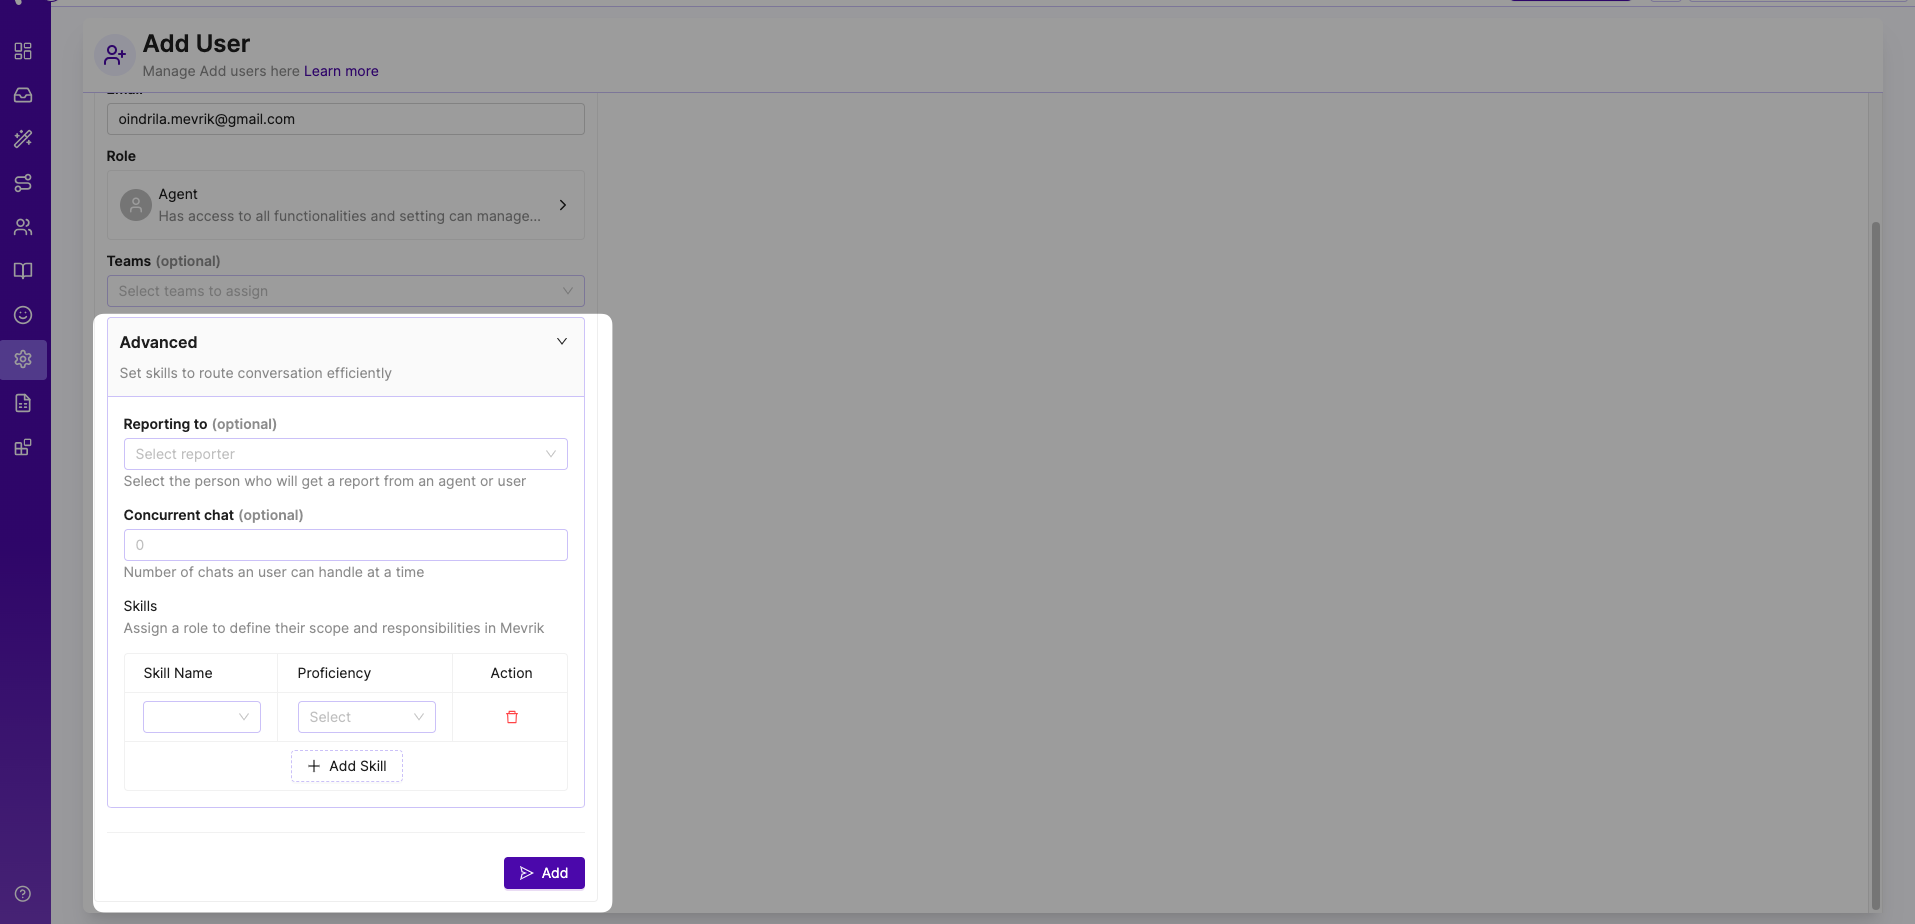
Advanced Features Configuration:
Reporting To If desired, the inviter can specify who the user reports to (Supervisor or Admin) for monitoring and administrative purposes.
Concurrent Chat: By Enabling this feature businesses can define the user's chat capacity, affecting how many chats they can handle simultaneously. Queue modules connected with this check below points
Skills (Productivity AI Subscription): If the business subscribes to the Productivity AI plan, the inviter can assign specific skills to users, defining their areas of responsibility.
Invitation Confirmation: After configuring the options, the inviter reviews the invitation details and clicks "Add" to confirm.
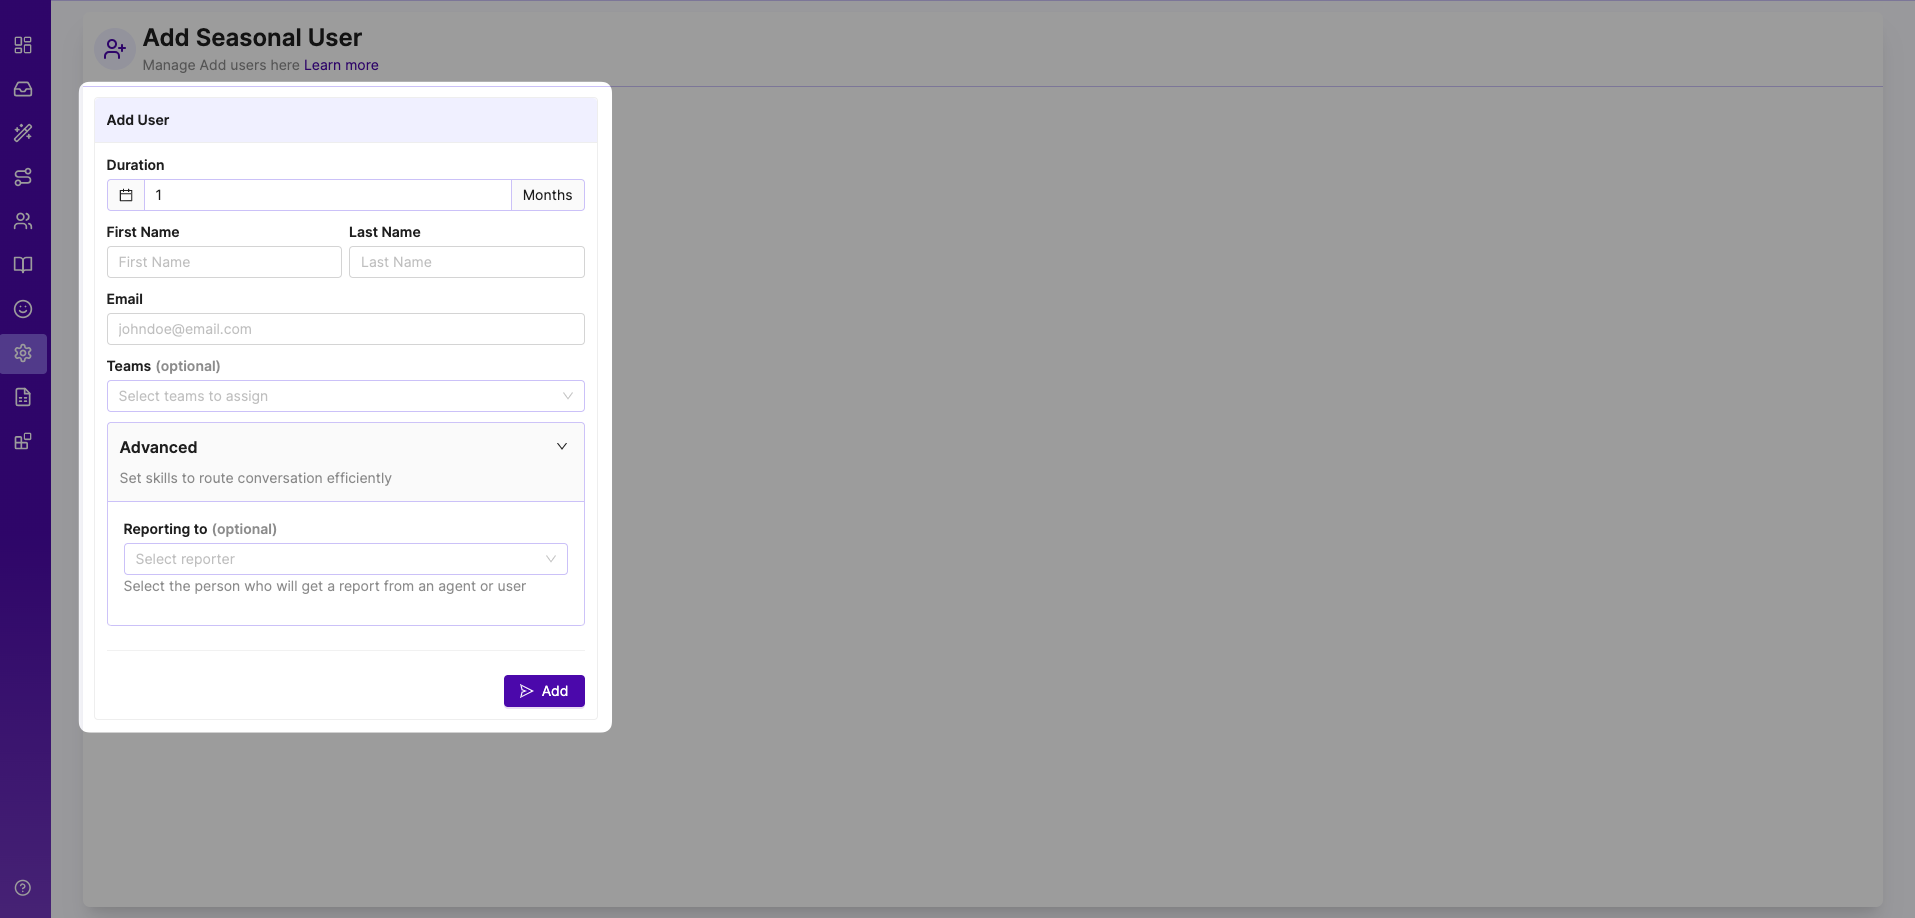
Add Seasonal User
Go to Settings -> Click "User" Option -> Press "Add User & Add Seasonal User " button.
Provide " Months Duration"-> First & Last name -> Email Address -> Select "Teams" -> Click Advanced and Select "Reporting To"-> Press the "Add" button.
Add View Only User
Go to Settings -> Click "User" Option -> Press "Add User & Add View Only UserUser " button.
Provide " Months Duration"-> First & Last name -> Email Address -> Select "Teams" -> Click Advanced and Select "Reporting To"-> Press the "Add" button.

Invite user
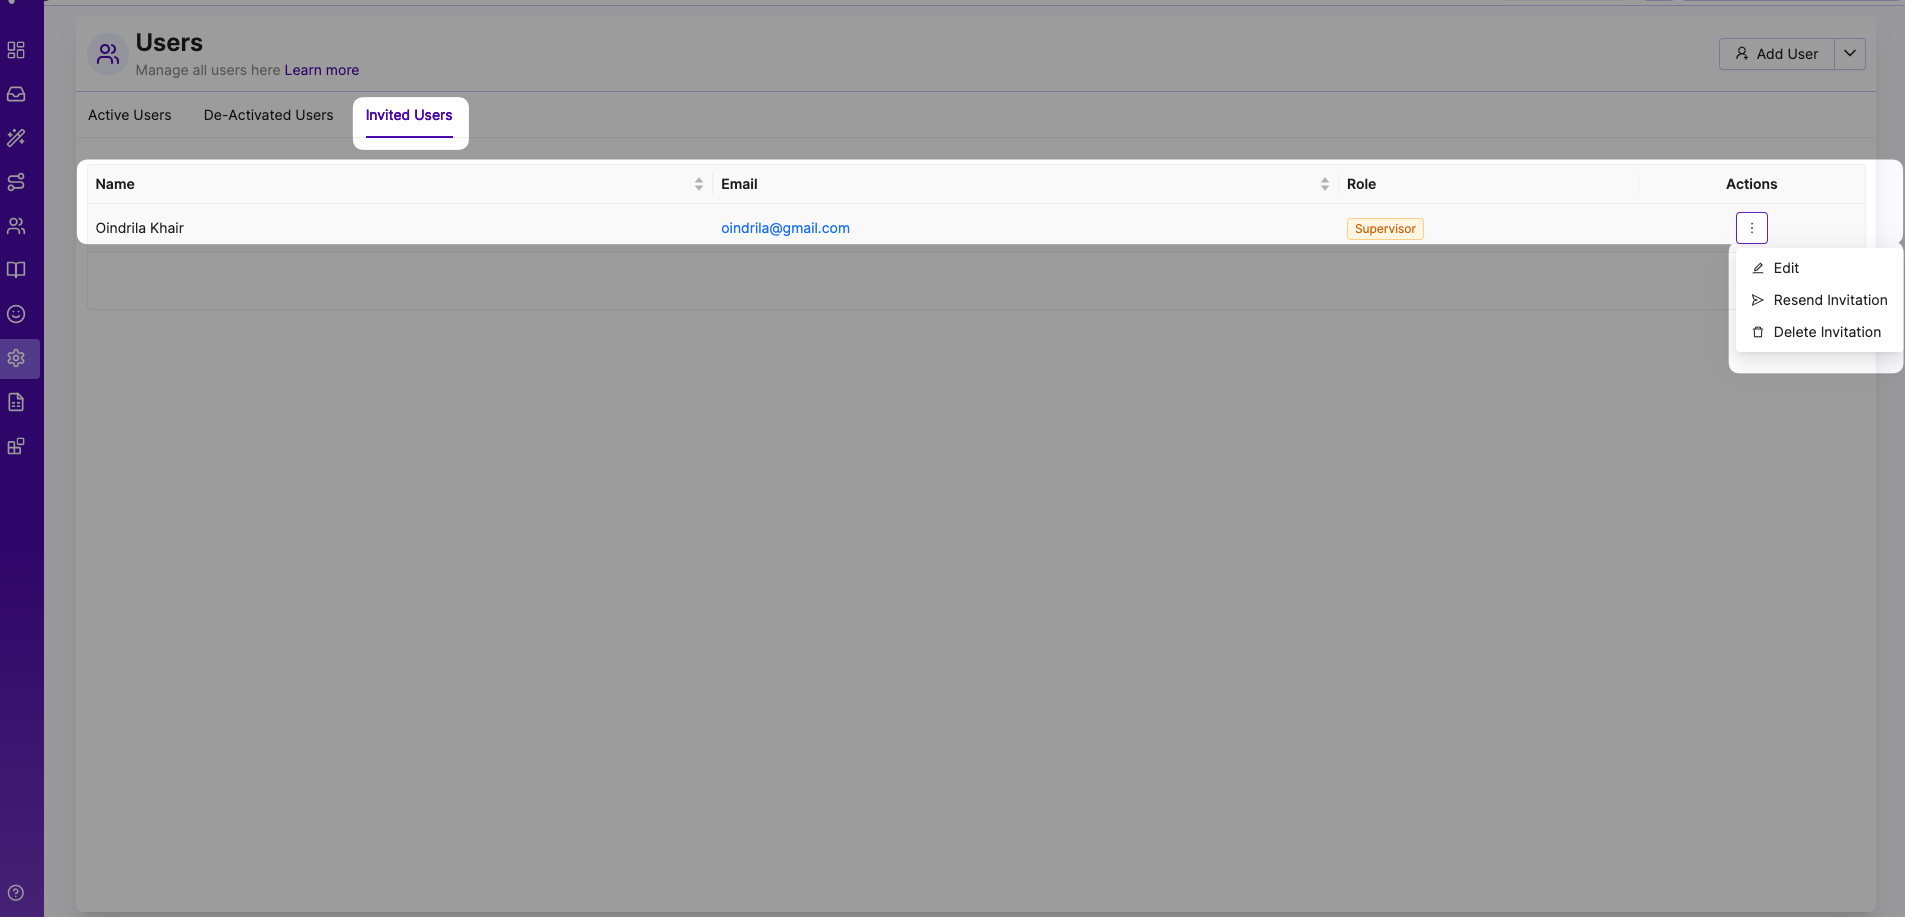
Invitation and Settings: Once confirmed, the system sends an invitation email to the recipient with an invitation link. Additionally, the invitation details and link are accessible on the settings page for reference.
Resending and Revoking Access: If needed, users can easily resend invitations or revoke access from the settings page.
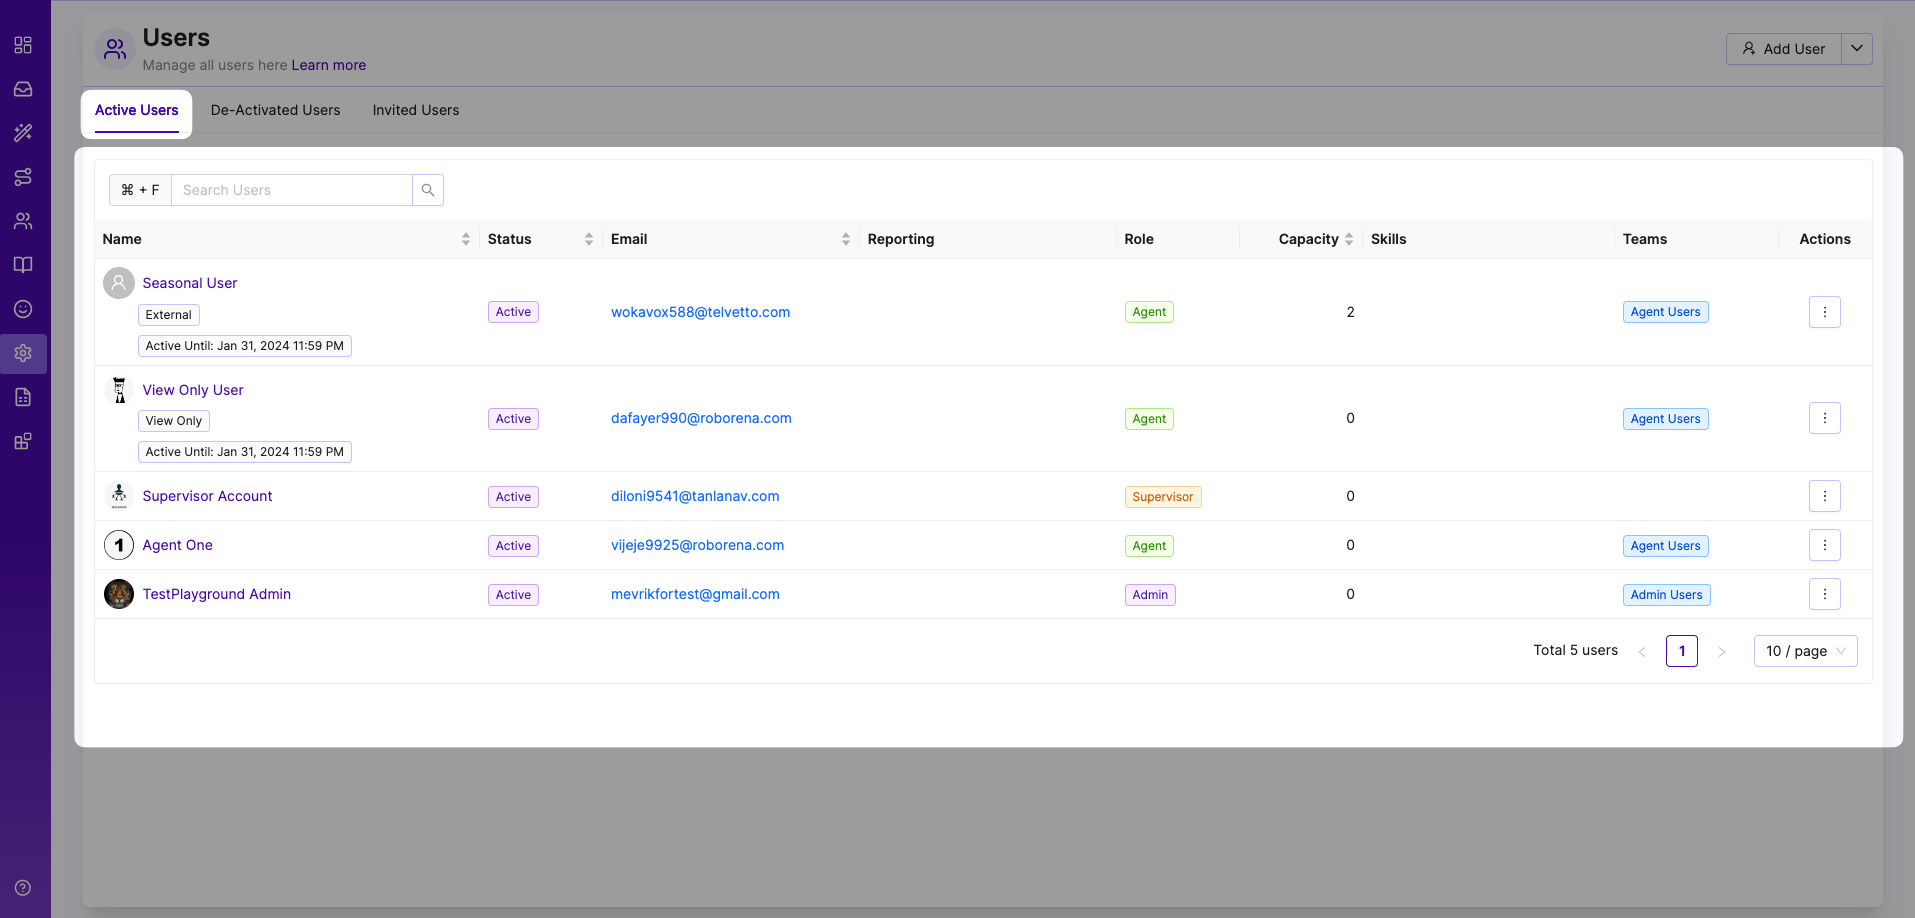
Active users
In the Active user tab, the list of active users will be shown which means the user status will be active mode. Once the user accepts the invitation, the user ID will be found in the active tab.
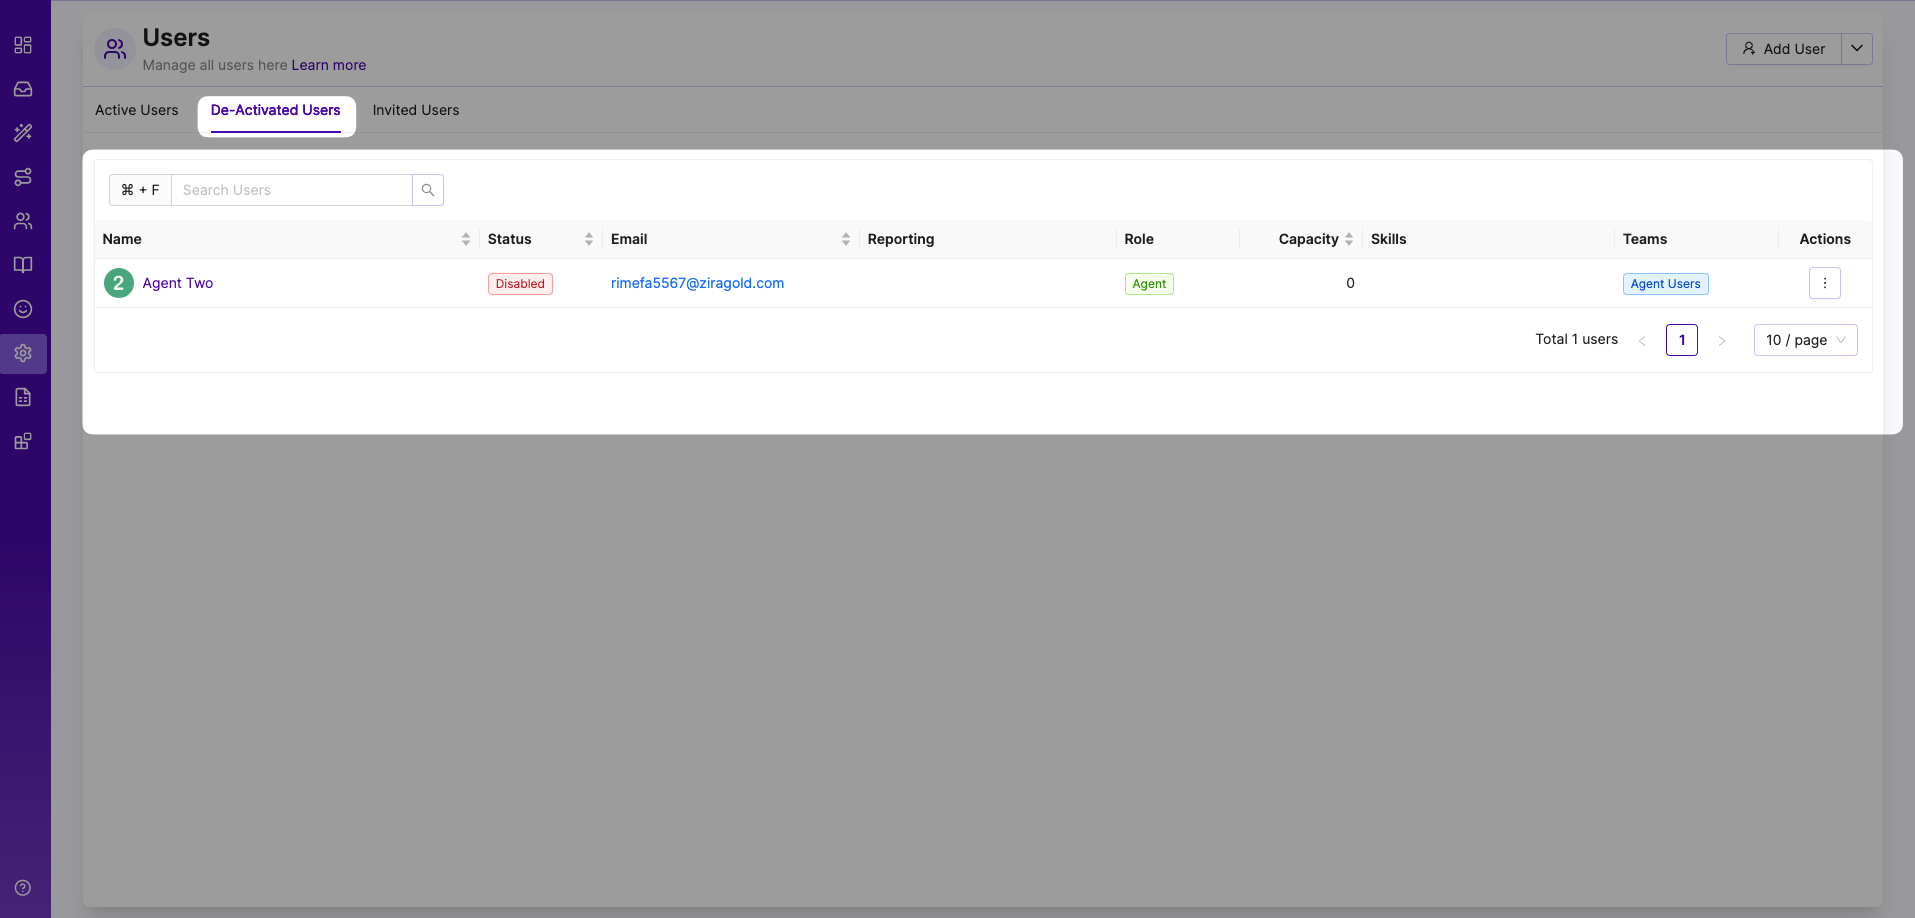
Deactivated users
If you deactivate a user, the user will be shown in the deactivate user tab.